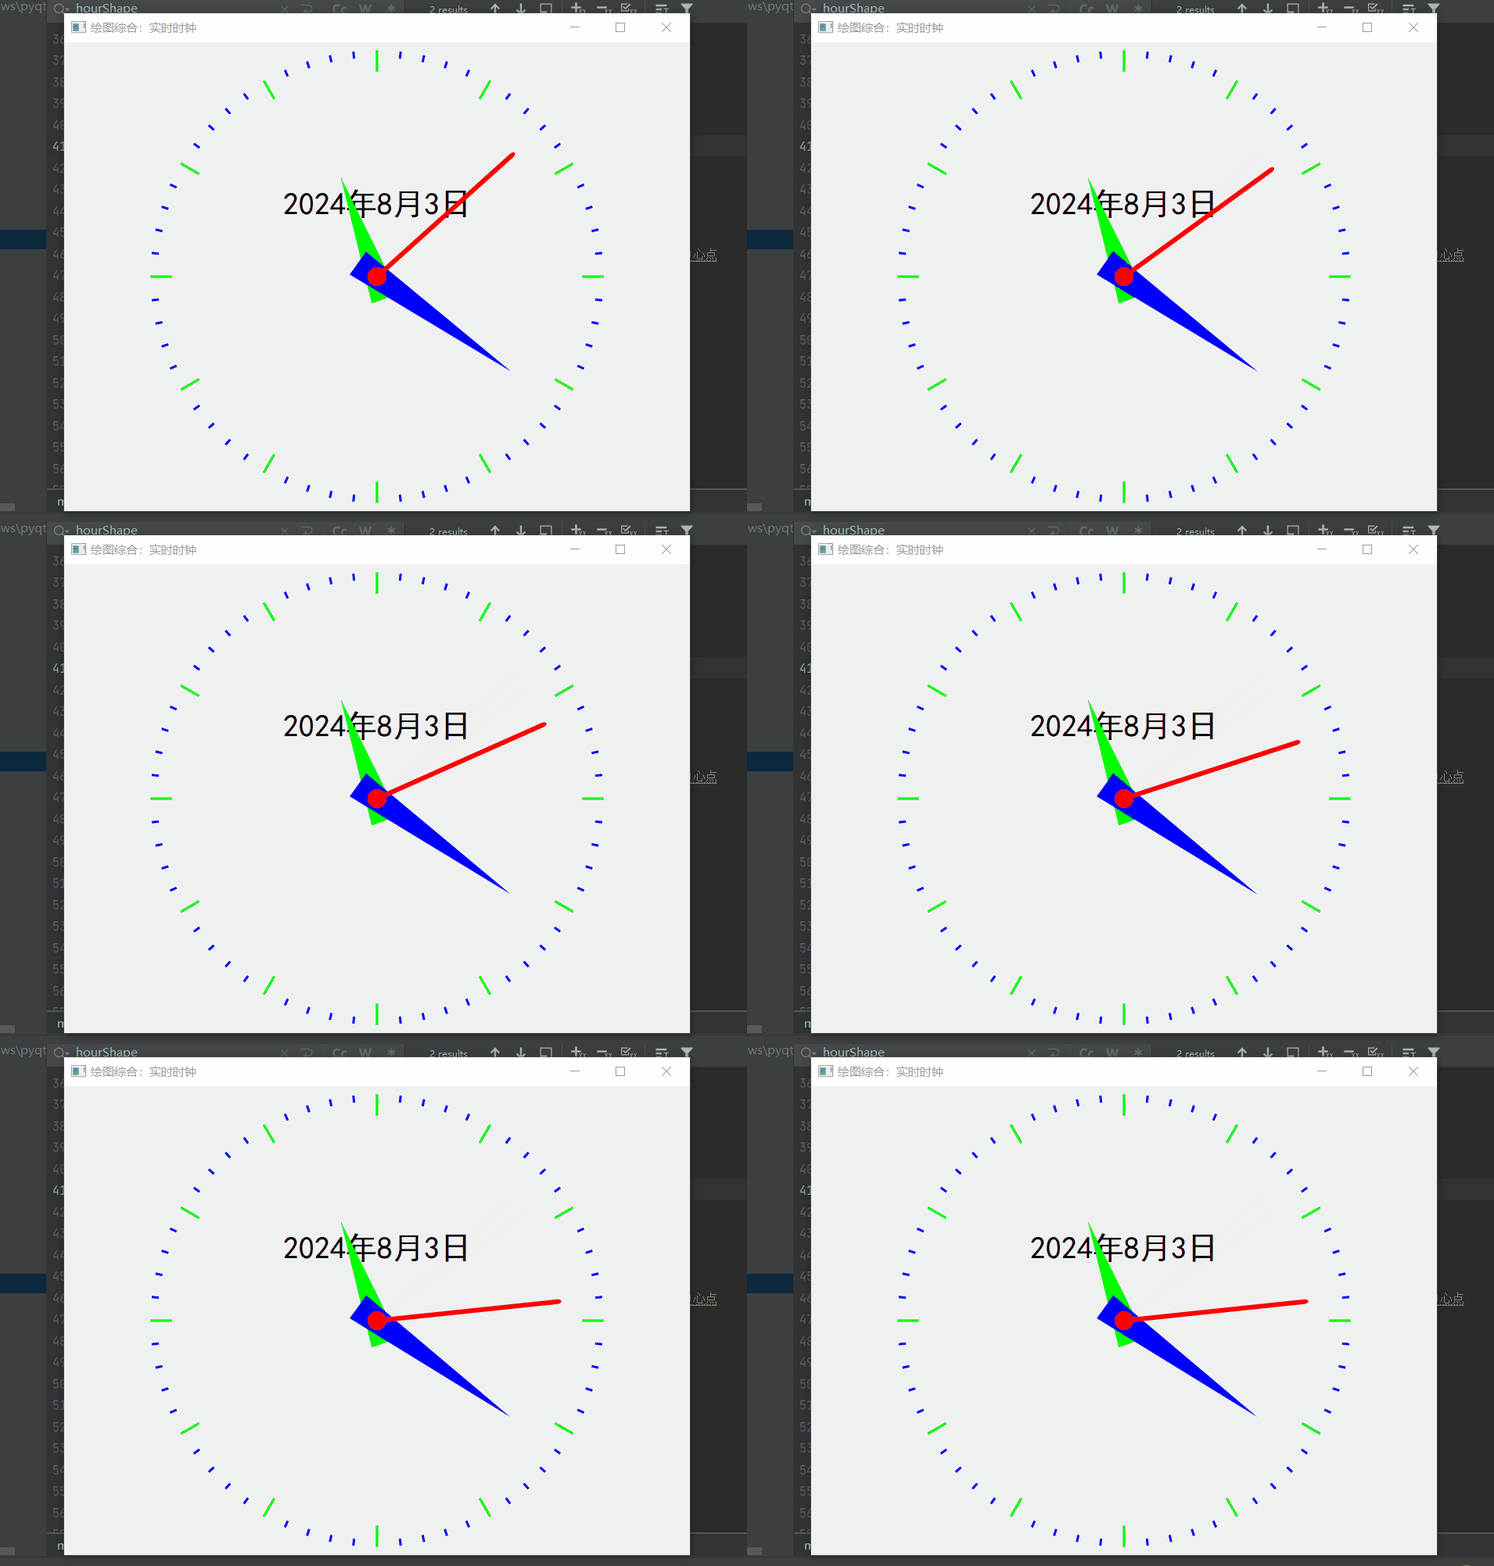
今天带给大家的是一些绘制图形的案例,第一个是绘制奥运图片,第二个是绘制五角星,第三个是绘制时钟。
1 绘制奥运图片
编辑
源码:
import sys
from PyQt6.QtWidgets import QApplication, QWidget
from PyQt6.QtCore import Qt, QRect
from PyQt6.QtGui import (QPainter, QPen, QBrush, QPalette, QColor, QFont, QImage)
class myWidget(QWidget):
    def __init__(self, parent=None):
        super().__init__(parent)
        self.setPalette(QPalette(Qt.GlobalColor.white))  # 设置窗口背景颜色为白色
        self.setAutoFillBackground(True)
        self.resize(600, 360)
        self.setWindowTitle("QPainter基本绘图")
    def paintEvent(self, event):  # 在窗口上绘图
        painter = QPainter(self)
        # 设置图形和文本抗锯齿
        painter.setRenderHint(QPainter.RenderHint.Antialiasing)
        painter.setRenderHint(QPainter.RenderHint.TextAntialiasing)
        # 设置画笔
        pen = QPen()
        pen.setWidth(3)  # 线宽3像素
        pen.setStyle(Qt.PenStyle.DotLine)  # 虚线
        # painter.setPen(pen)
        painter.setPen(Qt.PenStyle.NoPen)
        # 设置画刷
        brush = QBrush()
        brush.setColor(Qt.GlobalColor.red)
        brush.setStyle(Qt.BrushStyle.SolidPattern)  # 填充样式
        painter.setBrush(brush)
        # 绘图
        rect = QRect(20, 30, 200, 120)
        painter.drawRect(rect)
        # 设置画笔线宽为1像素,线型为实线,颜色为红色
        pen.setWidth(1)  # 线宽1像素
        pen.setStyle(Qt.PenStyle.SolidLine)  # 实线类型
        pen.setColor(Qt.GlobalColor.blue)  # 红颜色
        painter.setPen(pen)
        # 设置刷子颜色为蓝色,并设置填充样式为对角线模式
        brush.setColor(Qt.GlobalColor.blue)
        brush.setStyle(Qt.BrushStyle.BDiagPattern)  # 填充样式
        painter.setBrush(brush)
        # 使用新的画笔和刷子绘制一个扇形,其圆心位于(280, 30),半径分别为200和100,起始角度为30度,结束角度为300度
        painter.drawPie(280, 30, 200, 100, 30 * 16, 300 * 16)
        rect = QRect(20, 150, 240, 100)
        text = "我是奥运冠军,自信放光芒~!"
        pen.setColor(QColor(150, 255, 3))
        painter.setPen(pen)
        painter.setFont(QFont('楷体', 20))  # 设置字体
        painter.drawText(rect, Qt.AlignmentFlag.AlignCenter, text)
        image = QImage("./images/ticao.jpg")
        rect = QRect(280, 150, int(image.width() * 0.5), int(image.height()* 0.5))
        painter.drawImage(rect, image)
if __name__ == "__main__":
    app = QApplication(sys.argv)
    w = myWidget()
    w.show()
    sys.exit(app.exec())
2 绘制五角星
编辑
源码如下:
# -*- coding:utf-8 -*-
"""
------------------------------------------------
File Name: 五角星的绘制.py
Description:
Author: lzq
date:2024-08-03 09:56
------------------------------------------------
"""
import math
import sys
from PyQt6.QtWidgets import QApplication, QWidget
from PyQt6.QtGui import QPainter, QColor, QBrush, QPainterPath, QPolygon
from PyQt6.QtCore import Qt, QPoint
class ChinaFlag(QWidget):
    def __init__(self):
        super().__init__()
        self.initUI()
    def initUI(self):
        self.setGeometry(100, 100, 500,400)
        self.setWindowTitle('金色五角星')
        self.show()
    def paintEvent(self, e):
        painter = QPainter()
        painter.begin(self)
        self.drawFlag(painter)
        painter.end()
    def drawFlag(self, qp):
        # 红色背景
        qp.setBrush(QBrush(QColor(244, 0, 2)))
        qp.drawRect(10, 10, 288*2, 192*2)
        polygon=QPolygon([QPoint(100, 100),QPoint(166, 100),QPoint(200, 30),QPoint(232, 100),QPoint(300, 100),QPoint(245, 140),QPoint(280, 220),QPoint(200, 170),QPoint(120, 220),QPoint(155, 140)])
        qp.setBrush(QBrush(QColor(255, 255, 0)))
        qp.drawPolygon(polygon)
        qp.end()
if __name__ == '__main__':
    app = QApplication(sys.argv)
    ex = ChinaFlag()
    sys.exit(app.exec())
3 绘制时钟
编辑
源码如下:
# -*- coding:utf-8 -*-
"""
------------------------------------------------
File Name: 时钟.py
Description:
Author: lzq
date:2024-08-03 10:17
------------------------------------------------
"""
import sys
from PyQt6.QtCore import Qt, QPoint, QTime, QTimer,QDate,QRect
from PyQt6.QtGui import QColor, QPainter, QPolygon,QFont, QRegion
from PyQt6.QtWidgets import  QApplication, QWidget
class myClock(QWidget):
    # 时针形状
    hourShape = QPolygon([QPoint(6,10),QPoint(-6,10),QPoint(0,-45)])
    # 分针形状
    minuteShape = QPolygon([QPoint(6,10),QPoint(-6,10),QPoint(0,-70)])
    # 时分秒针颜色
    hourColor = QColor(0, 255, 0)
    minuteColor = QColor(0, 0, 255)
    secondColor = QColor(255, 0, 0)
    def __init__(self):
        super().__init__()
        self.setWindowTitle('绘图综合:实时时钟')
        # 创建定时器, 每秒刷新
        timer = QTimer(self)
        timer.timeout.connect(self.update)
        timer.start(1000)
    def paintEvent(self, event):
        time = QTime.currentTime()
        date = QDate.currentDate()
        year=date.year()
        month = date.month()
        day=date.day()
        ymd=str(year)+'年'+str(month)+'月'+str(day)+'日'
        rect= QRect(220,150,200,30)
        painter = QPainter(self)
        painter.setFont(QFont('黑体',24))
        painter.drawText(rect,Qt.AlignmentFlag.AlignCenter,ymd)
        painter.setRenderHint(QPainter.RenderHint.Antialiasing) #抗锯齿
        side = min(self.width(), self.height())
        painter.translate(self.width()/2, self.height()/2)      #平移到窗口中心点
        painter.scale(side/200.0, side/200.0)                   # 缩放比例
        # 绘制小时刻度
        painter.setPen(myClock.hourColor)
        for i in range(12):
            painter.drawLine(88, 0, 96, 0)
            painter.rotate(30.0)
        # 绘制分针刻度
        painter.setPen(myClock.minuteColor)
        for j in range(60):
            if (j % 5) != 0:
                painter.drawLine(94, 0, 96, 0)
            painter.rotate(6.0)
        # 绘制时针
        painter.setPen(Qt.PenStyle.NoPen)
        painter.setBrush(myClock.hourColor)
        painter.save()
        painter.rotate(30.0 * ((time.hour() + time.minute() / 60.0))) # 旋转时针到正确位置
        painter.drawPolygon(myClock.hourShape)
        painter.restore()
        # 绘制分针
        #painter.setPen(Qt.PenStyle.NoPen)
        painter.setBrush(myClock.minuteColor)
        painter.save()
        painter.rotate(6.0 * (time.minute() + time.second() / 60.0))
        painter.drawConvexPolygon(myClock.minuteShape)
        painter.restore()
        # 绘制秒针
        painter.setPen(Qt.PenStyle.NoPen)
        painter.setBrush(myClock.secondColor)
        painter.drawEllipse(-4, -4, 8, 8)
        painter.save()
        painter.rotate(6.0 * time.second())
        painter.drawRoundedRect(-1, -1, 80, 2, 2, 2)
        painter.restore()
    # def resizeEvent(self, event):
    #     w = self.width()
    #     h = self.height()
    #     side = min(w, h)
    #     # 为窗口设置一个圆形遮罩
    #     maskedRegion = QRegion(w/2 - side/2, h/2 - side/ 2, side, side, QRegion.RegionType.Ellipse)
    #     self.setMask(maskedRegion)
if __name__ == '__main__':
    app = QApplication(sys.argv)
    w = myClock()
    w.show()
    sys.exit(app.exec())


