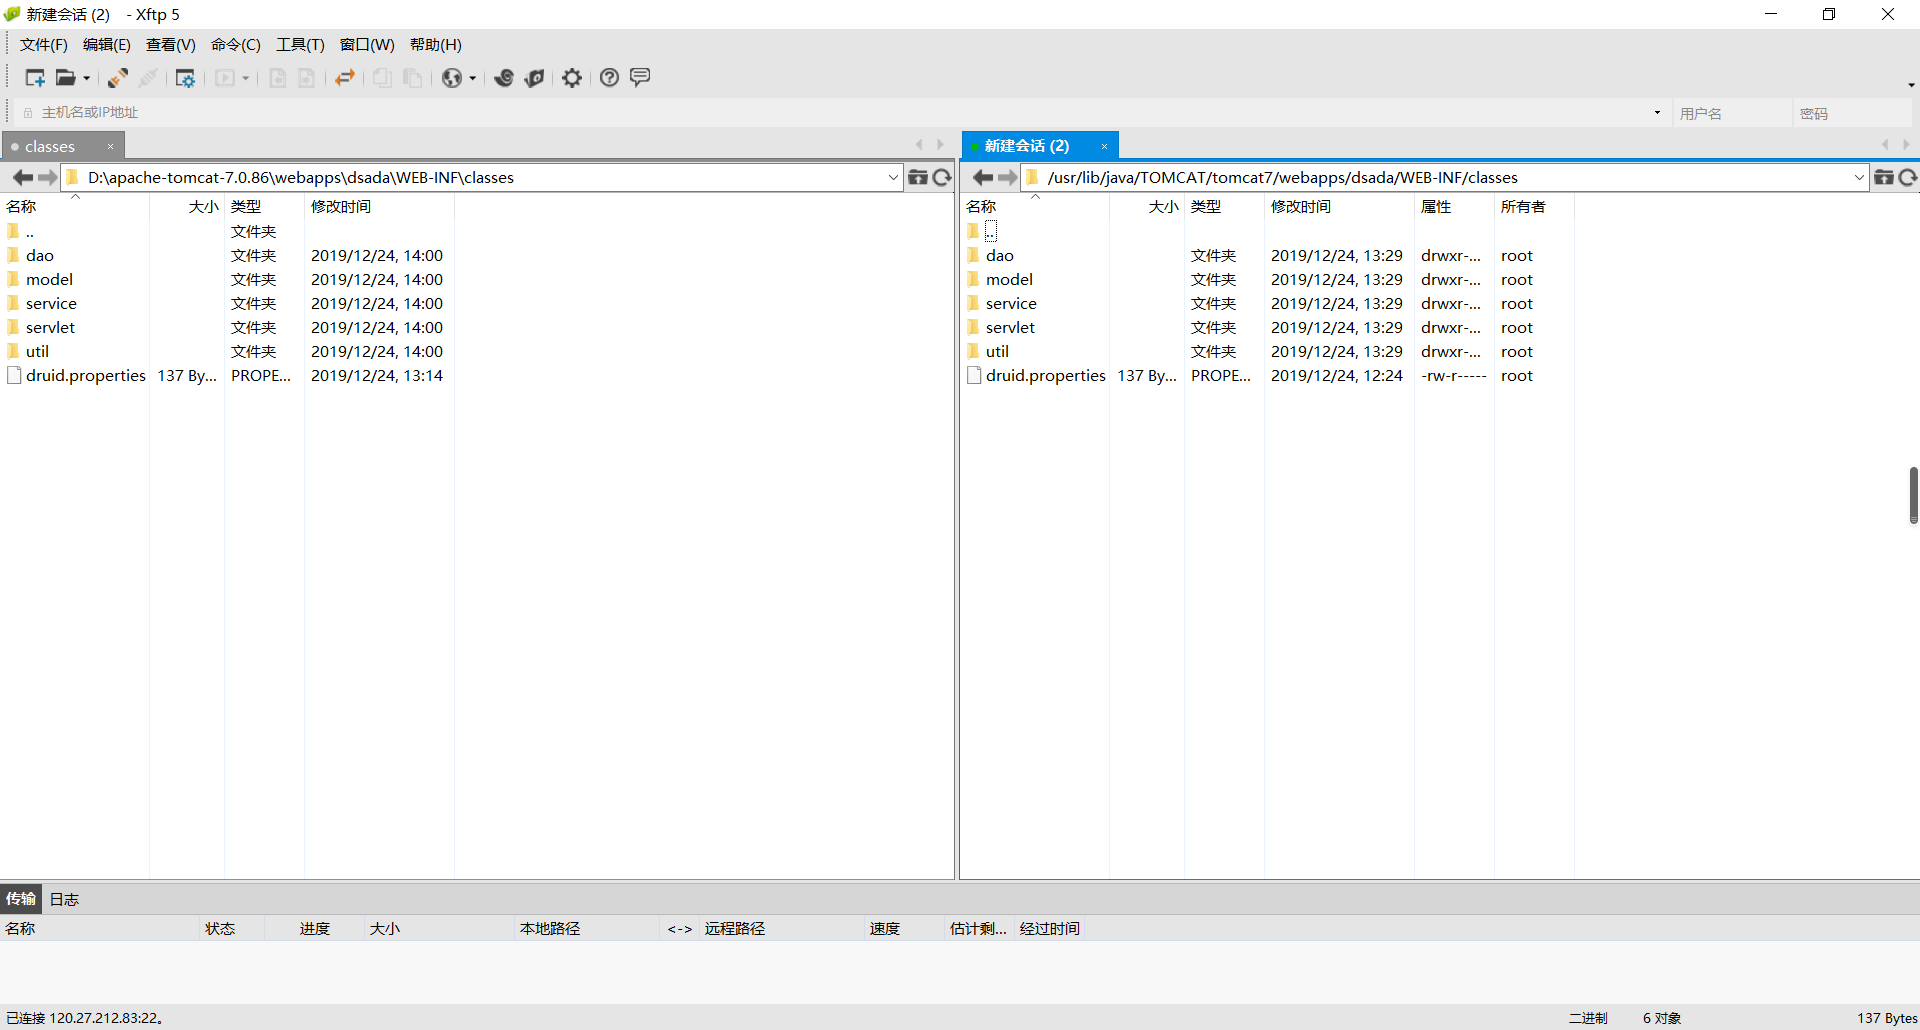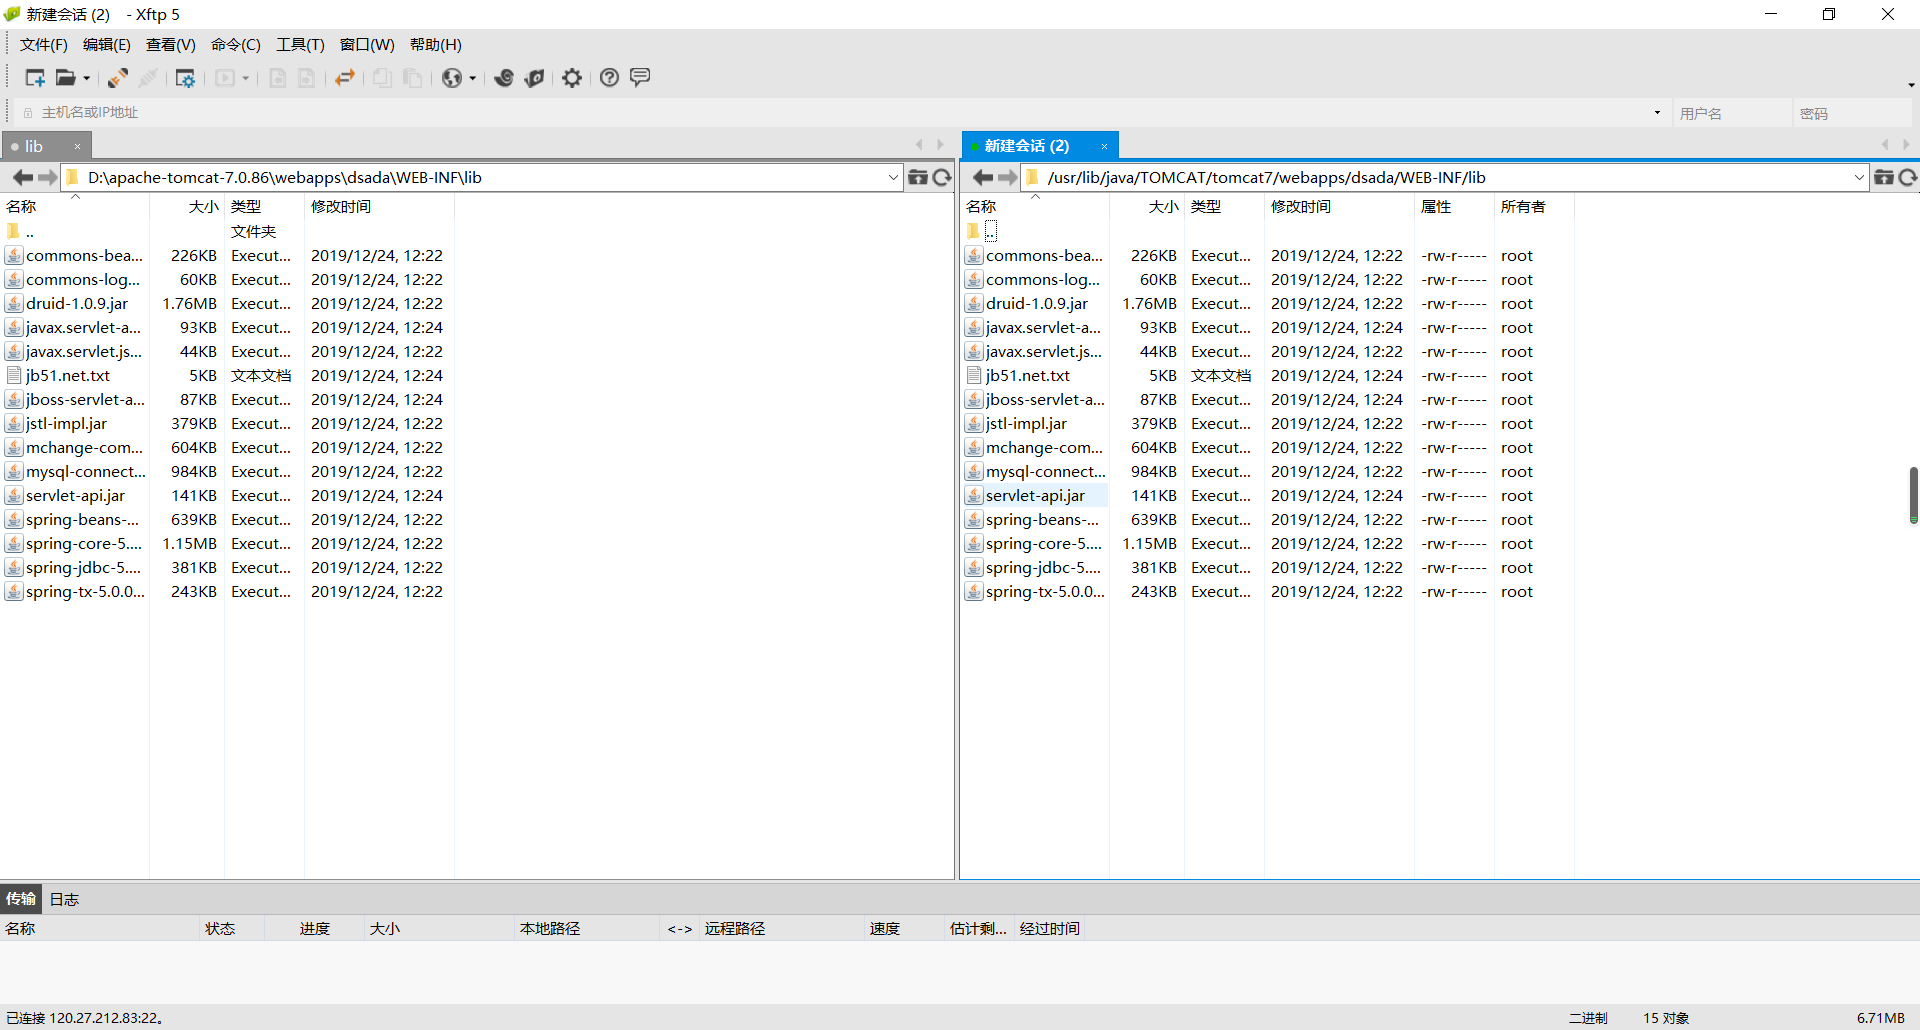
在阿里云上购买学生版的ecs, 自己装了tomcat7+java8+mysql5.7 然后部署javaweb项目。
这个javaweb项目本地正常运行,发布到ecs上之后可访问jsp文件,但无法访问servlet,一访问就报http404,第一此访问会报http500 Error instantiating servlet class。 我尝试作了一个jsp直接调用java文件,代码如下
<%@ page import="dao.*"%>
<%@ page import="dao.impl.StudentDaoImpl"%>
.........
..............
<%
 StudentDao ad =new StudentDaoImpl();
%>
<%=ad.queryAllStudent().get(0).getName()%>
提示http500:Unsupported major.minor version 52.0(编译版本高于运行)但我的java与tomcat版本与本机是一样的,
本机 tomcat7.0.86,java 1.8.0.13 ;
ecs tomcat7.0.99 java 8u40b25
而且curl的内容与外面浏览器结果都一致web.xml
<?xml version="1.0" encoding="UTF-8"?>
<web-app xmlns:xsi="http://www.w3.org/2001/XMLSchema-instance" xmlns="http://java.sun.com/xml/ns/javaee" xsi:schemaLocation="http://java.sun.com/xml/ns/javaee http://java.sun.com/xml/ns/javaee/web-app_3_0.xsd" id="WebApp_ID" version="3.0">
  <display-name>studentAD</display-name>
  <welcome-file-list>
    <welcome-file>index.html</welcome-file>
    <welcome-file>index.htm</welcome-file>
    <welcome-file>index.jsp</welcome-file>
    <welcome-file>default.html</welcome-file>
    <welcome-file>default.htm</welcome-file>
    <welcome-file>default.jsp</welcome-file>
  </welcome-file-list>

  <servlet>
        <servlet-name>findStuByPageServlet</servlet-name>
        <servlet-class>servlet.FindStuByPageServlet</servlet-class>
    </servlet>

    <servlet-mapping>
        <servlet-name>findStuByPageServlet</servlet-name>
        <url-pattern>/findStuByPageServlet</url-pattern>
    </servlet-mapping>

</web-app>
ecs的tomcat下webapp文件夹  lib文件
lib文件 
遇到了同样的问题,在CSDN看到了,希望阿里云团队能够给出正确、标准的答案~请查看
版权声明:本文内容由阿里云实名注册用户自发贡献,版权归原作者所有,阿里云开发者社区不拥有其著作权,亦不承担相应法律责任。具体规则请查看《阿里云开发者社区用户服务协议》和《阿里云开发者社区知识产权保护指引》。如果您发现本社区中有涉嫌抄袭的内容,填写侵权投诉表单进行举报,一经查实,本社区将立刻删除涉嫌侵权内容。
、添加8080端口的安全组规则 这里写图片描述
2、把war包放在tomcat的webapps目录下, 然后打开tomcat的bin目录 运行 startup.bat。Maven项目打包的方式如下(之后会在target目录下生成war包): 这里写图片描述
3、tomcat启动后,输入http:ip:8080/项目名访问即可。 这里写图片描述
spring boot项目部署 以war形式打包
在pom.xml里设置 war 1 移除嵌入式tomcat插件
在pom.xml里找到spring-boot-starter-web依赖节点,在其中添加如下代码 org.springframework.boot spring-boot-starter-web org.springframework.boot spring-boot-starter-tomcat
org.springframework.boot spring-boot-starter-tomcat provided 1 2 3 4 5 6 7 8 9 10 11 12 13 14 15 16 17 18 修改打包名称<build>
<plugins>
<plugin>
<groupId>org.springframework.boot</groupId>
<artifactId>spring-boot-maven-plugin</artifactId>
</plugin>
<plugin>
<groupId>org.apache.maven.plugins</groupId>
<artifactId>maven-war-plugin</artifactId>
<configuration>
<warName>blog</warName>
</configuration>
</plugin>
</plugins>
</build>
1 2 3 4 5 6 7 8 9 10 11 12 13 14 15 16 修改启动类,并重写初始化方法
/** * 修改启动类,继承 SpringBootServletInitializer 并重写 configure 方法 */ public class WebsiteApplication extends SpringBootServletInitializer {
@Override
protected SpringApplicationBuilder configure(SpringApplicationBuilder application) {
    return application.sources(WebsiteApplication.class);
}

public static void main(String[] args) {
    SpringApplication.run(WebsiteApplication.class, args);
}
} 1 2 3 4 5 6 7 8 9 10 11 12 13 14 打包部署
进入项目根目录下,在命令行里输入:mvn clean package -Dmaven.test.skip=true 然后把target目录下的war包放到tomcat的webapps目录下,启动tomcat,即可自动解压部署 最后在浏览器中输入 http://localhost:[端口号]/[打包项目名]/ 即可访问 去掉项目名直接访问 在tomcat的安装目录的conf文件夹下找到server.xml文件 修改端口号为:80
1 2 3 找到 Host标签,一般在最后面
1 2 3 4 5 启动tomcat访问localhost或者访问你的IP就可以访问你的项目啦