
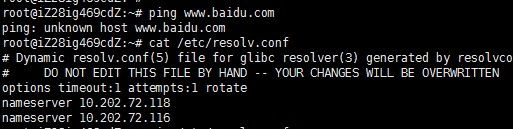
云服务器 ECS Ubuntu系统修改 resolv.conf 文件后,重启系统后,自动还原了之前的 DNS 配置信息。如下图所示:
版权声明:本文内容由阿里云实名注册用户自发贡献,版权归原作者所有,阿里云开发者社区不拥有其著作权,亦不承担相应法律责任。具体规则请查看《阿里云开发者社区用户服务协议》和《阿里云开发者社区知识产权保护指引》。如果您发现本社区中有涉嫌抄袭的内容,填写侵权投诉表单进行举报,一经查实,本社区将立刻删除涉嫌侵权内容。
Ubuntu 系统中 /etc/resolv.conf 其实是一个软连接(Link),它其实指向的是 /run/resolvconf/resolv.conf。如果需求开机不进行自动还原,需要修改上述文件。
也可以直接修改网卡配置文件,或者修改 /etc/resolvconf/resolv.conf.d/tail 文件后通过 resolvconf -u 命令进行更新。
可以参阅如下步骤进行修改和调整:
1、修改 /run/resolvconf/resolv.conf
$ vi /run/resolvconf/resolv.conf
# Dynamic resolv.conf(5) file for glibc resolver(3) generated by resolvconf(8)
#     DO NOT EDIT THIS FILE BY HAND -- YOUR CHANGES WILL BE OVERWRITTEN
options timeout:1 attempts:1 rotate
nameserver 223.5.5.5
nameserver 223.6.6.6
2、在网卡配置文件 /etc/network/interfaces 里面添加相应 DNS 服务器地址,比如:dns-nameservers 223.5.5.5 223.6.6.6
$ vi /etc/network/interfaces
auto lo
iface lo inet loopback
auto eth1
iface eth1 inet static
address 112.*.*.131
netmask 255.255.252.0
dns-servers 223.5.5.5 223.6.6.6
up route add -net 0.0.0.0 netmask 0.0.0.0 gw 112.*.*.247 dev eth1
auto eth0
iface eth0 inet static
address 10.*.*.214
netmask 255.255.240.0
up route add -net 172.16.0.0 netmask 255.240.0.0 gw 10.*.*.247 dev eth0
up route add -net 100.64.0.0 netmask 255.192.0.0 gw 10.*.*.247 dev eth0
up route add -net 10.0.0.0 netmask 255.0.0.0 gw 10.*.*.247 dev eth0
~
3、修改 /etc/resolvconf/resolv.conf.d/tail ,然后通过 resolvconf -u 命令进行更新:
$ vi /etc/resolvconf/resolv.conf.d/tail
options timeout:1 attempts:1 rotate
nameserver 223.5.5.5
nameserver 223.6.6.6
root@iZ28ig469cdZ:~# resolvconf -u

Stopped Name Service Cache Daemon: nscd.


Starting Name Service Cache Daemon nscd

...done.
