- 参考文档: Swiper中文网-轮播图幻灯片js插件,H5页面前端开发
- vue参考文档: Swiper Vue.js Components
- swiper各版本比较: swiper简介和swiper各版本兼容性 - Swiper中文网
- 配置文档: 中文api - Swiper中文网
vue**2建议使用v5.4.5**
①安装插件:yarn add swiper@5.4.5
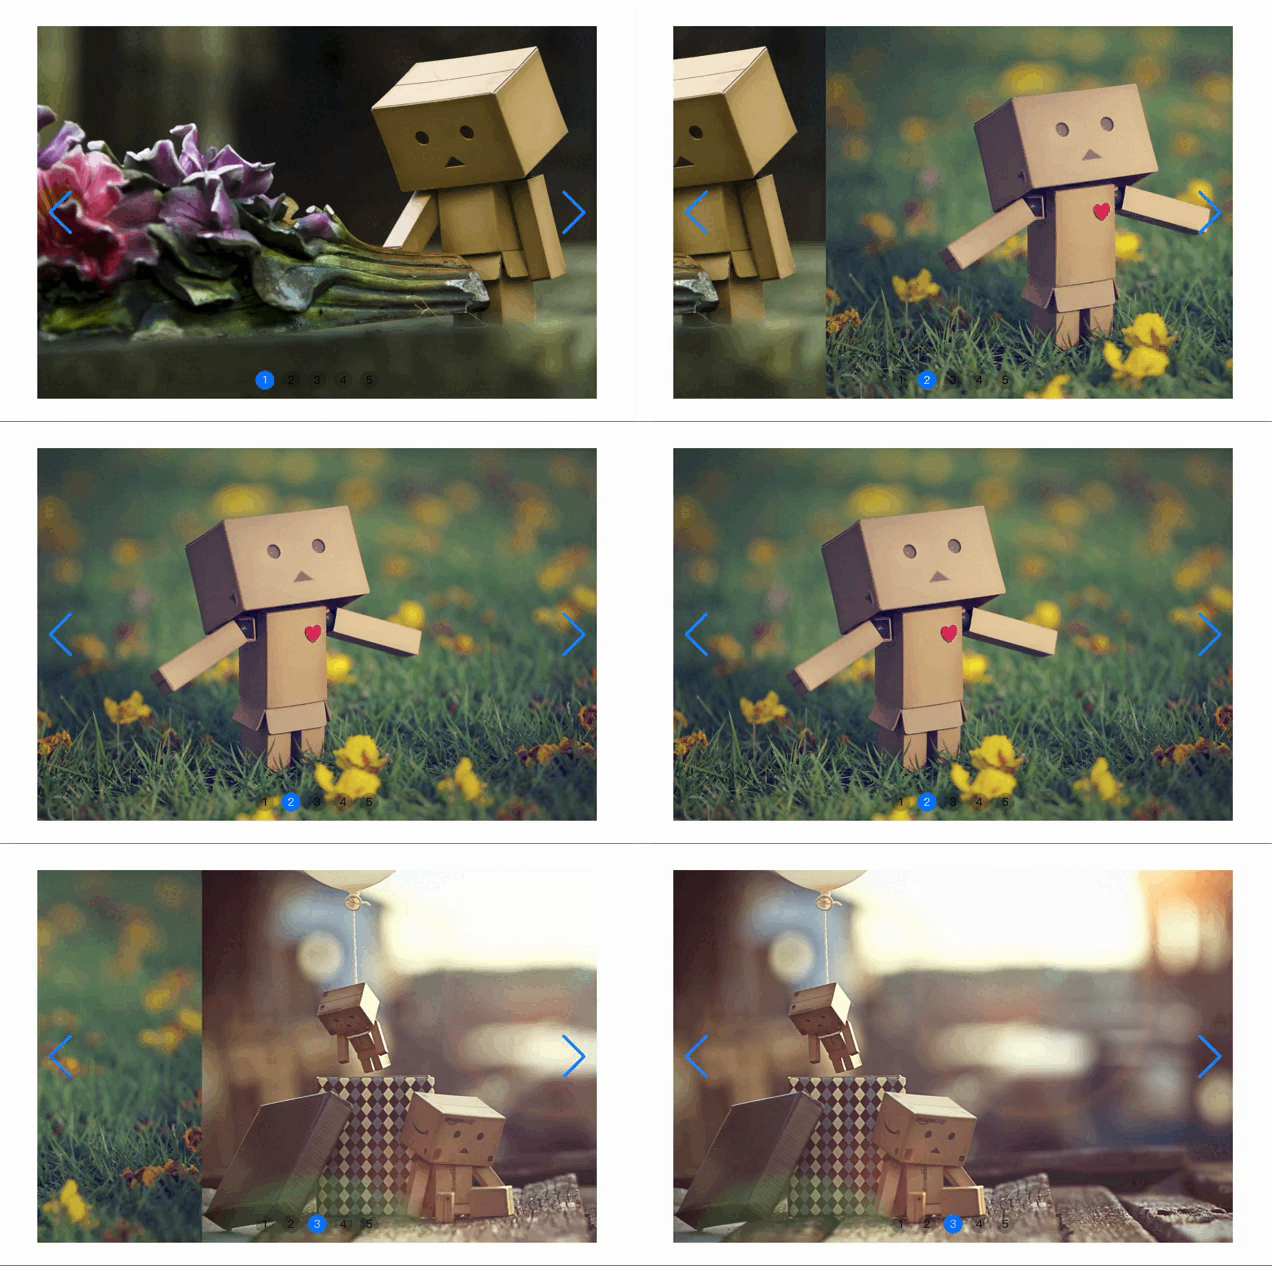
②使用方式一:首页左右滑动轮播图BannerSlide.vue:
效果图如下:

<template>
  <div class="swiper-container" :style="`width: ${width}; height: ${height};`">
    <div class="swiper-wrapper">
      <div
        class="swiper-slide"
        :title="image.title"
        v-for="(image, index) in imageData"
        :key="index">
        <div class="swiper-zoom-container">
          <div class="swiper-zoom-target swiper-lazy" :data-background="image.imgUrl">
            <div class="swiper-lazy-preloader swiper-lazy-preloader-white"></div>
          </div>
        </div>
      </div>
    </div>
    <!-- 如果需要分页器 -->
    <div class="swiper-pagination"></div>
    <!-- 如果需要导航按钮 -->
    <div class="swiper-button-prev"></div><!--左箭头。如果放置在swiper外面,需要自定义样式。-->
    <div class="swiper-button-next"></div><!--右箭头。如果放置在swiper外面,需要自定义样式。-->
  </div>
</template>
<script>
import 'swiper/css/swiper.css'
import Swiper from 'swiper'
export default {
  name: 'BannerSlide',
  props: {
    imageData: { // 图片数组
      type: Array,
      default: () => {
        return []
      }
    },
    width: { // 宽度
      type: String,
      default: '400px'
    },
    height: { // 高度
      type: String,
      default: '300px'
    }
  },
  data () {
    return {
      swiper: null
    }
  },
  mounted () {
    this.swiper = new Swiper('.swiper-container', {
      lazy: {
        loadPrevNext: true, // 默认false情况下swiper只加载当前slide的图片,其他图片不加载,设置为true后,swiper会提前加载下一个slide的图片
        loadPrevNextAmount: 2 // 默认为1,设置在延迟加载图片时,提前多少个slide
      },
      zoom: { // 开启缩放功能,双击slide会放大/缩小,并且在手机端可双指触摸缩放
        maxRatio: 3, // 默认3,设置缩放的最大放大比例,如果要在单个slide设置放大比例,可以在其上添加data-swiper-zoom="3"
        minRatio: 2, // 默认为1,最小缩放焦距(缩小倍率)
        toggle: true // 默认为true,是否允许双击缩放,为false时,不允许双击缩放,只允许手机端触摸缩放
      },
      pagination: { // 如果需要分页器
        el: '.swiper-pagination',
        // dynamicBullets: true, // 动态分页器,分页器小点的数量部分隐藏
        // dynamicMainBullets: 2, // 动态分页器的主指示点数量
        clickable: true, // 点击分页器的指示点控制swiper切换
        type: 'bullets', // 分页器样式类型,默认bullets圆点 fraction分式,progressbar进度条,custom自定义
        renderBullet: function (index, className) {
          console.log('index:', index)
          console.log('className:', className)
          return '<span class="' + className + '">' + (index + 1) + '</span>'
        }
      },
      navigation: { // 如果需要前进后退按钮
        nextEl: '.swiper-button-next',
        prevEl: '.swiper-button-prev'
      },
      scrollbar: { // 如果需要滚动条
        el: '.swiper-scrollbar',
        hide: true // 滚动条是否自动隐藏,默认false
      },
      mousewheel: true, // 是否开启鼠标滚轮控制swiper切换 ,默认false
      direction: 'horizontal', // 滑动方向
      speed: 500, // 切换速度,自动滑动开始到结束的时间
      grabCursor: true, // 悬浮时鼠标样式切换
      centerInsufficientSlides: true, // 当slide总数小于slidesPerView时,slide居中
      effect: 'slide', // slide的切换效果,默认为'slide'位移切换,'fade'淡入,'cube'方块,'coverflow'3d流,'flip'3d翻转,'cards'卡片式,'creative'创意性
      cubeEffect: { // cube效果参数
        slideShadows: false, // 是否开启slide投影,默认true
        shadow: false, // 是否开启投影,默认true
        shadowOffset: 20, // 投影距离。默认 20,单位px。
        shadowScale: 1 // 投影缩放比例。默认0.94。
      },
      // autoplay: true, // 启动自动切换,等同于以下设置
      autoplay: {
        delay: 3000, // 多少秒切换一次,默认3000ms
        disableOnInteraction: false, // 用户操作之后,是否禁止autoplay,默认true,操作包括触碰,拖动,点击pagination
        waitForTransition: true // 是否等待过渡完成,再开始自动切换的计时,默认true
      },
      loop: true // 循环模式选项
    })
    // 6.6.2之前的版本需要通过代码实现此功能;开启后,鼠标置于swiper时暂停自动切换,离开时回复自动切换
    this.swiper.el.onmouseover = function () { // 鼠标覆盖停止自动切换
      this.swiper.autoplay.stop()
    }
    this.swiper.el.onmouseout = function () { // 鼠标离开开始自动切换
      this.swiper.autoplay.start()
    }
  }
}
</script>
<style lang="less" scoped>
@themeColor: #1890FF;
.swiper-container {
  --swiper-theme-color: @themeColor;/* 设置Swiper风格 */
  --swiper-navigation-color: @themeColor;/* 单独设置按钮颜色 */
  --swiper-navigation-size: 48px;/* 设置导航按钮大小 */
  --swiper-pagination-color: #00ff33;/* 单独设置分页导航颜色 */
  --swiper-theme-color: #ff6600;/* 设置Swiper风格 */
  --swiper-preloader-color: @themeColor;/* 单独设置预加载圆圈的颜色 */
  margin: 0 auto;
  .swiper-wrapper { // 自动切换过渡效果设置
    transition-timing-function: ease;
    -webkit-transition-timing-function: ease;
    .swiper-slide { // 懒加载时背景图
      // background: url(~@/assets/images/default.png) no-repeat center;
      background-color: #000;
      background-size: cover;
    }
    .swiper-lazy {
      width: 100%;
      height: 100%;
      background-size: cover;
    }
  }
  .swiper-pagination { // 自定义分页器样式
    /deep/ .swiper-pagination-bullet {
      width: 20px;
      height: 20px;
      text-align: center;
      line-height: 20px;
      font-size: 12px;
      color: #000;
      opacity: 1;
      background: rgba(0,0,0,0.2);
    }
    /deep/ .swiper-pagination-bullet-active {
      color: #fff;
      background: #007aff;
    }
  }
}
</style>
在要使用的页面引入:
<BannerSlide :imageData="imageData" width="540px" height="360px" />
import BannerSlide from 'components/swiper/BannerSlide'
components: {
    BannerSlide
},
imageData: [
    {
        title: 'image-1',
        imgUrl: require('@/assets/images/1.jpg')
    },
    {
        title: 'image-2',
        imgUrl: require('@/assets/images/2.jpg')
    },
    {
        title: 'image-3',
        imgUrl: require('@/assets/images/3.jpg')
    },
    {
        title: 'image-4',
        imgUrl: require('@/assets/images/4.jpg')
    },
    {
        title: 'image-5',
        imgUrl: require('@/assets/images/5.jpg')
    }
]
③使用方式二:淡入淡出逐渐缩小轮播图BannerFade.vue:
效果如下图:

<template>
  <div class="swiper-container" :style="`width: ${width}; height: ${height};`">
    <div class="swiper-wrapper">
      <div
        class="swiper-slide"
        :title="image.title"
        v-for="(image, index) in imageData"
        :key="index">
        <a href="https://www.baidu.com" class="u-link" target="_blank">
          <!-- 奇数时放大zoomin,偶数时缩小zoomout,但图片需传偶数个效果最佳 -->
          <!-- <img :src="image.imgUrl" :class="['u-img', index%2 === 0 ? 'default-in zoomin':'default-out zoomout']" /> -->
          <!-- 全部缩小zoomout的渐变效果 -->
          <img :src="image.imgUrl" class="u-img default-out zoomout" />
        </a>
        <!-- 延迟加载 -->
        <!-- <div class="swiper-lazy" :data-background="image.imgUrl">
          <div class="swiper-lazy-preloader swiper-lazy-preloader-white"></div>
        </div> -->
      </div>
    </div>
    <!-- 如果需要分页器 -->
    <div class="swiper-pagination"></div>
    <!-- 如果需要导航按钮 -->
    <div class="swiper-button-prev"></div><!--左箭头。如果放置在swiper外面,需要自定义样式。-->
    <div class="swiper-button-next"></div><!--右箭头。如果放置在swiper外面,需要自定义样式。-->
  </div>
</template>
<script>
import 'swiper/css/swiper.css'
import Swiper from 'swiper'
export default {
  name: 'BannerFade',
  props: {
    imageData: { // 图片数组
      type: Array,
      default: () => {
        return []
      }
    },
    width: { // 宽度
      type: String,
      default: '400px'
    },
    height: { // 高度
      type: String,
      default: '300px'
    }
  },
  data () {
    return {
      swiper: null
    }
  },
  mounted () {
    this.swiper = new Swiper('.swiper-container', {
      lazy: {
        loadPrevNext: true, // 默认false情况下swiper只加载当前slide的图片,其他图片不加载,设置为true后,swiper会提前加载下一个slide的图片
        loadPrevNextAmount: 2 // 默认为1,设置在延迟加载图片时,提前多少个slide
      },
      zoom: { // 开启缩放功能,双击slide会放大/缩小,并且在手机端可双指触摸缩放
        maxRatio: 3, // 默认3,设置缩放的最大放大比例,如果要在单个slide设置放大比例,可以在其上添加data-swiper-zoom="3"
        minRatio: 2, // 默认为1,最小缩放焦距(缩小倍率)
        toggle: true // 默认为true,是否允许双击缩放,为false时,不允许双击缩放,只允许手机端触摸缩放
      },
      pagination: { // 如果需要分页器
        el: '.swiper-pagination',
        // dynamicBullets: true, // 动态分页器,分页器小点的数量部分隐藏
        // dynamicMainBullets: 2, // 动态分页器的主指示点数量
        clickable: true, // 点击分页器的指示点控制swiper切换
        type: 'bullets', // 分页器样式类型,默认bullets圆点 fraction分式,progressbar进度条,custom自定义
        renderBullet: function (index, className) {
          console.log('index:', index)
          console.log('className:', className)
          return '<span class="' + className + '">' + (index + 1) + '</span>'
        }
      },
      navigation: { // 如果需要前进后退按钮
        nextEl: '.swiper-button-next',
        prevEl: '.swiper-button-prev'
      },
      scrollbar: { // 如果需要滚动条
        el: '.swiper-scrollbar',
        hide: true // 滚动条是否自动隐藏,默认false
      },
      mousewheel: true, // 是否开启鼠标滚轮控制swiper切换 ,默认false
      direction: 'horizontal', // 滑动方向
      speed: 1000, // 切换速度,自动滑动开始到结束的时间
      grabCursor: true, // 悬浮时鼠标样式切换
      centerInsufficientSlides: true, // 当slide总数小于slidesPerView时,slide居中
      effect: 'fade', // slide的切换效果,默认为'slide'位移切换,'fade'淡入,'cube'方块,'coverflow'3d流,'flip'3d翻转,'cards'卡片式,'creative'创意性
      fadeEffect: {
        crossFade: true
      },
      // autoplay: true, // 启动自动切换,等同于以下设置
      autoplay: {
        delay: 3000, // 多少秒切换一次,默认3000ms
        disableOnInteraction: true, // 用户操作之后,是否禁止autoplay,默认true,操作包括触碰,拖动,点击pagination
        waitForTransition: true // 是否等待过渡完成,再开始自动切换的计时,默认true
      },
      loop: true // 循环模式选项
    })
    // 6.6.2之前的版本需要通过代码实现此功能;开启后,鼠标置于swiper时暂停自动切换,离开时回复自动切换
    this.swiper.el.onmouseover = function () { // 鼠标覆盖停止自动切换
      this.swiper.autoplay.stop()
    }
    this.swiper.el.onmouseout = function () { // 鼠标离开开始自动切换
      this.swiper.autoplay.start()
    }
  }
}
</script>
<style lang="less" scoped>
@themeColor: #1890FF;
.swiper-container {
  --swiper-theme-color: @themeColor;/* 设置Swiper风格 */
  --swiper-navigation-color: @themeColor;/* 单独设置按钮颜色 */
  --swiper-navigation-size: 48px;/* 设置导航按钮大小 */
  --swiper-pagination-color: #00ff33;/* 单独设置分页导航颜色 */
  --swiper-theme-color: #ff6600;/* 设置Swiper风格 */
  --swiper-preloader-color: @themeColor;/* 单独设置预加载圆圈的颜色 */
  margin: 0 auto;
  .swiper-wrapper { // 自动切换过渡效果设置
    transition-timing-function: ease;
    -webkit-transition-timing-function: ease;
    .swiper-slide { // 懒加载时背景图
      // background: url(~@/assets/images/default.png) no-repeat center;
      // background-color: #000;
      // background-size: cover;
      .u-link {
        display: block;
        height: 100%;
      }
      .u-img {
        width: 100%;
        height: 100%;
        object-fit: cover;
      }
      .default-in { // 缩小
        transition: 1s linear 2s;
        transform: scale(1);
        -webkit-transform: scale(1);
      }
      .default-out { // 放大
        transition: 1s linear 2s;
        transform: scale(1.1);
        -webkit-transform: scale(1.1);
      }
    }
    .swiper-slide-active, .swiper-slide-duplicate-active {
      .zoomin { // 放大
        transition: 6s linear;
        transform: scale(1.1);
        -webkit-transform: scale(1.1);
      }
      .zoomout { // 缩小
        transition: 6s linear;
        transform: scale(1);
        -webkit-transform: scale(1);
      }
    }
    .swiper-lazy {
      width: 100%;
      height: 100%;
      background-size: cover;
    }
  }
  .swiper-pagination { // 自定义分页器样式
    :deep(.swiper-pagination-bullet) {
      width: 20px;
      height: 20px;
      text-align: center;
      line-height: 20px;
      font-size: 12px;
      color: #000;
      opacity: 1;
      background: rgba(0,0,0,0.2);
    }
    :deep(.swiper-pagination-bullet-active) {
      color: #fff;
      background: #007aff;
    }
  }
}
</style>
在要使用的页面引入组件:
<BannerFade :imageData="imageData" width="540px" height="360px" />
import BannerFade from 'components/swiper/BannerFade'
components: {
    BannerFade
},
imageData: [
    {
        title: 'image-1',
        imgUrl: require('@/assets/images/1.jpg')
    },
    {
        title: 'image-2',
        imgUrl: require('@/assets/images/2.jpg')
    },
    {
        title: 'image-3',
        imgUrl: require('@/assets/images/3.jpg')
    },
    {
        title: 'image-4',
        imgUrl: require('@/assets/images/4.jpg')
    },
    {
        title: 'image-5',
        imgUrl: require('@/assets/images/5.jpg')
    }
]
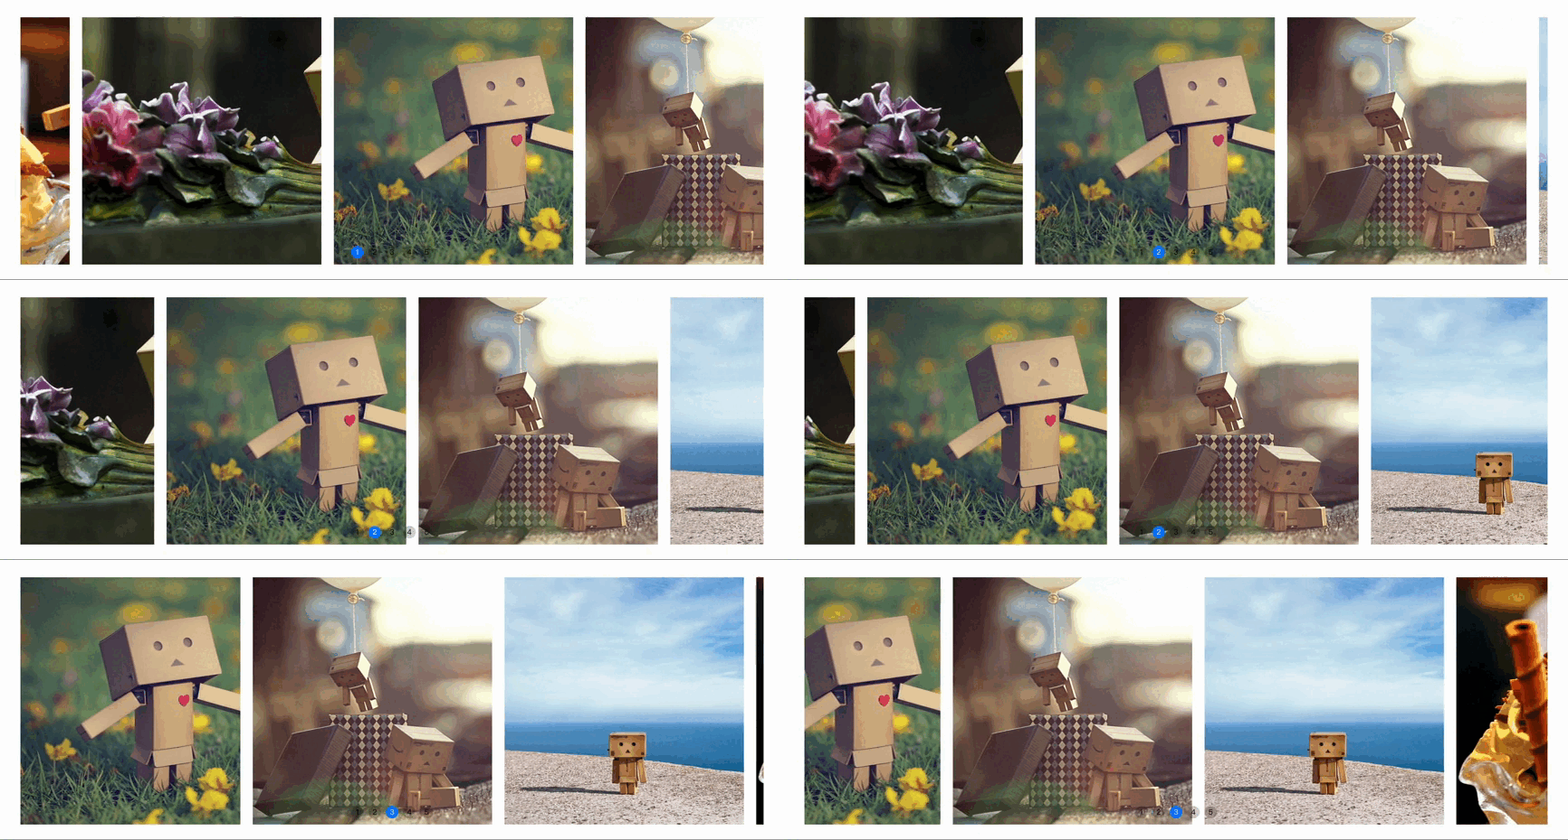
④使用方式三:走马灯Carousel.vue:
效果图如下:

<template>
  <div class="swiper-container" :style="`width: ${width}; height: ${height};`">
    <div class="swiper-wrapper">
      <div
        class="swiper-slide"
        :title="image.title"
        v-for="(image, index) in imageData"
        :key="index">
        <div class="swiper-lazy" :data-background="image.imgUrl">
          <div class="swiper-lazy-preloader swiper-lazy-preloader-white"></div>
        </div>
      </div>
    </div>
    <!-- 如果需要分页器 -->
    <div class="swiper-pagination"></div>
  </div>
</template>
<script>
import 'swiper/css/swiper.css'
import Swiper from 'swiper'
export default {
  name: 'Carousel',
  props: {
    imageData: { // 图片数组
      type: Array,
      default: () => {
        return []
      }
    },
    width: { // 宽度
      type: String,
      default: '1200px'
    },
    height: { // 高度
      type: String,
      default: '400px'
    }
  },
  data () {
    return {
      swiper: null
    }
  },
  mounted () {
    this.swiper = new Swiper('.swiper-container', {
      lazy: {
        loadPrevNext: true, // 默认false情况下swiper只加载当前slide的图片,其他图片不加载,设置为true后,swiper会提前加载下一个slide的图片
        loadPrevNextAmount: 2 // 默认为1,设置在延迟加载图片时,提前多少个slide
      },
      pagination: { // 如果需要分页器
        el: '.swiper-pagination',
        // dynamicBullets: true, // 动态分页器,分页器小点的数量部分隐藏
        // dynamicMainBullets: 2, // 动态分页器的主指示点数量
        clickable: true, // 点击分页器的指示点控制swiper切换
        type: 'bullets', // 分页器样式类型,默认bullets圆点 fraction分式,progressbar进度条,custom自定义
        renderBullet: function (index, className) {
          console.log('index:', index)
          console.log('className:', className)
          return '<span class="' + className + '">' + (index + 1) + '</span>'
        }
      },
      mousewheel: true, // 是否开启鼠标滚轮控制swiper切换 ,默认false
      direction: 'horizontal', // 滑动方向
      speed: 3000, // 切换速度,自动滑动开始到结束的时间
      grabCursor: true, // 悬浮时鼠标样式切换
      slidesPerView: 3, // slider容器能够同时显示的slides数量,默认为1,auto自动根据slide宽度来设定数量
      slidesPerGroup: 1, // 定义多少slide为一组,默认为1
      spaceBetween: 20, // slide之间的距离
      centerInsufficientSlides: true, // 当slide总数小于slidesPerView时,slide居中
      effect: 'slide', // slide的切换效果,默认为'slide'位移切换,'fade'淡入,'cube'方块,'coverflow'3d流,'flip'3d翻转,'cards'卡片式,'creative'创意性
      // autoplay: true, // 启动自动切换,等同于以下设置
      autoplay: {
        delay: 0, // 多少秒切换一次,默认3000ms
        disableOnInteraction: false, // 用户操作之后,是否禁止autoplay,默认true,操作包括触碰,拖动,点击pagination
        waitForTransition: true // 是否等待过渡完成,再开始自动切换的计时,默认true
      },
      loop: true // 循环模式选项
    })
    // 6.6.2之前的版本需要通过代码实现此功能;开启后,鼠标置于swiper时暂停自动切换,离开时回复自动切换
    this.swiper.el.onmouseover = function () { // 鼠标覆盖停止自动切换
      this.swiper.autoplay.stop()
    }
    this.swiper.el.onmouseout = function () { // 鼠标离开开始自动切换
      this.swiper.autoplay.start()
    }
  }
}
</script>
<style lang="less" scoped>
.swiper-container {
  --swiper-theme-color: #1890FF;/* 设置Swiper风格 */
  --swiper-pagination-color: #00ff33;/* 单独设置分页导航颜色 */
  margin: 0 auto;
  .swiper-wrapper { // 自动切换过渡效果设置
    transition-timing-function: linear; // 线性过渡模拟走马灯效果
    -webkit-transition-timing-function: linear;
    .swiper-slide { // 懒加载时背景图
      // background: url(~@/assets/images/default.png) no-repeat center;
      background-color: #000;
      background-size: cover;
    }
    .swiper-lazy {
      width: 100%;
      height: 100%;
      background-size: cover;
    }
  }
  .swiper-pagination { // 自定义分页器样式
    :deep(.swiper-pagination-bullet) {
      width: 20px;
      height: 20px;
      text-align: center;
      line-height: 20px;
      font-size: 12px;
      color: #000;
      opacity: 1;
      background: rgba(0,0,0,0.2);
    }
    :deep(.swiper-pagination-bullet-active) {
      color: #fff;
      background: #007aff;
    }
  }
}
</style>
在要使用的页面引入:
<Carousel :imageData="imageData" width="1200px" height="400px" />
import Carousel from 'components/swiper/Carousel'
components: {
    Carousel
},
imageData: [
    {
        title: 'image-1',
        imgUrl: require('@/assets/images/1.jpg')
    },
    {
        title: 'image-2',
        imgUrl: require('@/assets/images/2.jpg')
    },
    {
        title: 'image-3',
        imgUrl: require('@/assets/images/3.jpg')
    },
    {
        title: 'image-4',
        imgUrl: require('@/assets/images/4.jpg')
    },
    {
        title: 'image-5',
        imgUrl: require('@/assets/images/5.jpg')
    }
]


