【带小白做毕设】13. SpringBoot+Vue实现单文件、多文件上传和下载_哔哩哔哩_bilibili
文档编写的还有待提高,可以参考青戈的文档编写格式,单文件下载接口:
package zero.file.videoProject.controller;


import cn.hutool.core.io.FileUtil;
import org.springframework.beans.factory.annotation.Value;
import org.springframework.web.bind.annotation.*;
import org.springframework.web.multipart.MultipartFile;
import zero.file.videoProject.bean.Result;

import javax.servlet.ServletOutputStream;
import javax.servlet.http.HttpServletResponse;
import java.io.File;
import java.io.IOException;

@RestController
@RequestMapping("/file")
public class FileController {
    @Value("${ip:localhost}")
    String ip;
    @Value("${server.port}")
    String port;
    private static final String ROOT_PATH = System.getProperty("user.dir") + File.separator + "files";
    @PostMapping("/upload")
    public Result upload(MultipartFile file) throws IOException {
        String originalFilename = file.getOriginalFilename(); // 文件的原始名称
        String mainName = FileUtil.mainName(originalFilename);
        String extName = FileUtil.extName("文件的后缀");
        // 当前文件的目录
        // 判断一下文件存储的路径存不存在,这种主要是文件上传重名问题
        if (!FileUtil.exist(ROOT_PATH)){
            FileUtil.mkdir(ROOT_PATH);
            // 如果不存在,创建这样一个目录
        }
        // 如果当前文件的父级目录不存在
        if (FileUtil.exist(ROOT_PATH + File.separator + originalFilename)){
            originalFilename = System.currentTimeMillis() + "_" + mainName+ "." + extName;
        }
        File saveFile = new File(ROOT_PATH + File.separator + originalFilename); // D:\project\零一电科\技术资料\lingyidianke\zeroBackEnd\files\\121232312321323_aaa.png
        file.transferTo(saveFile);
        String url = "http://" + ip + ":" + port + "/file/download/" + originalFilename;
        return Result.success(url);
    }
    @GetMapping("/download/{fileName}")
    public void download(@PathVariable String fileName,HttpServletResponse response) throws IOException {
        String filePath = ROOT_PATH + File.separator + fileName;
        if (!FileUtil.exist(filePath)) {
            return;
        }
        byte[] bytes = FileUtil.readBytes(filePath);
        ServletOutputStream outputStream = response.getOutputStream();
        outputStream.write(bytes);
        outputStream.flush();
        outputStream.close();
    }
}
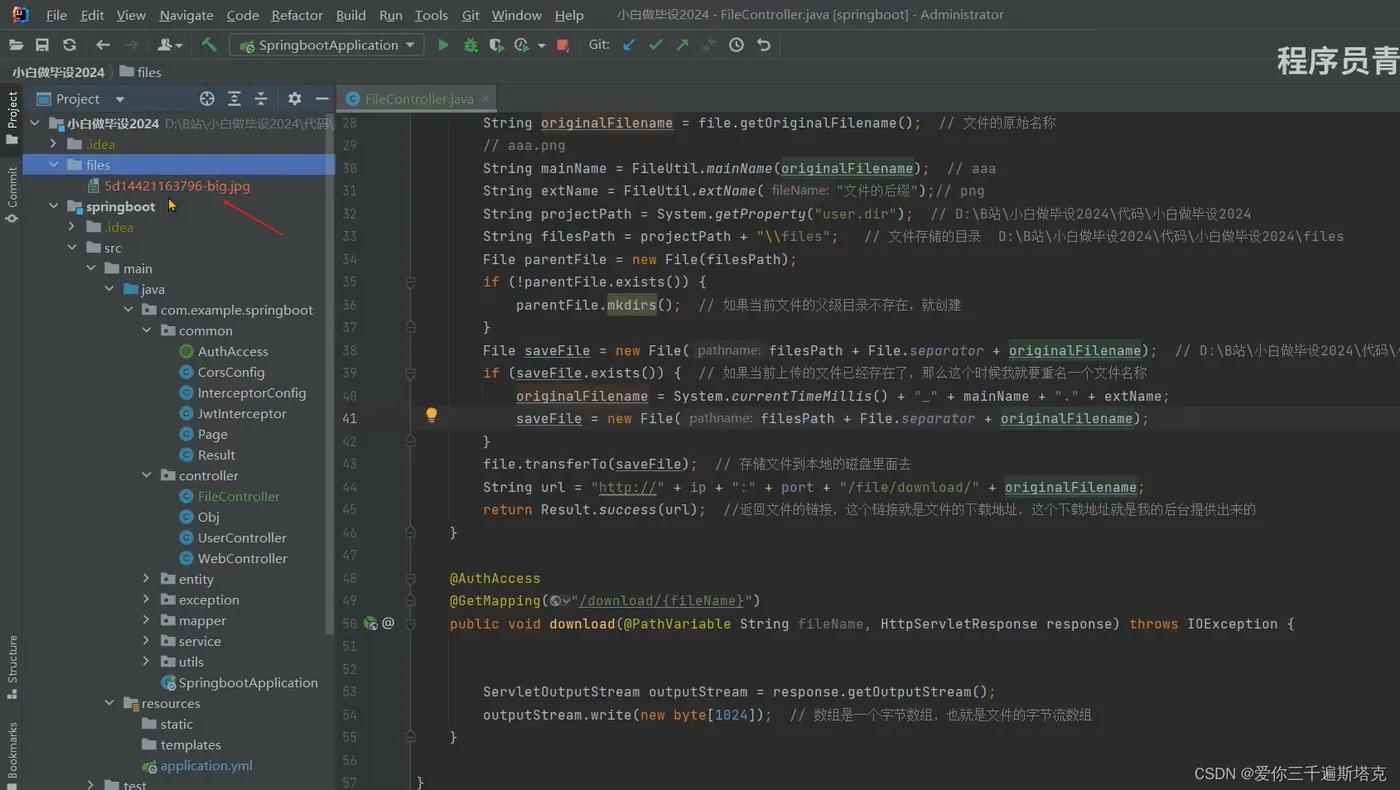
因为我们要获取到接口的资料:不能再写一遍吧!!!!
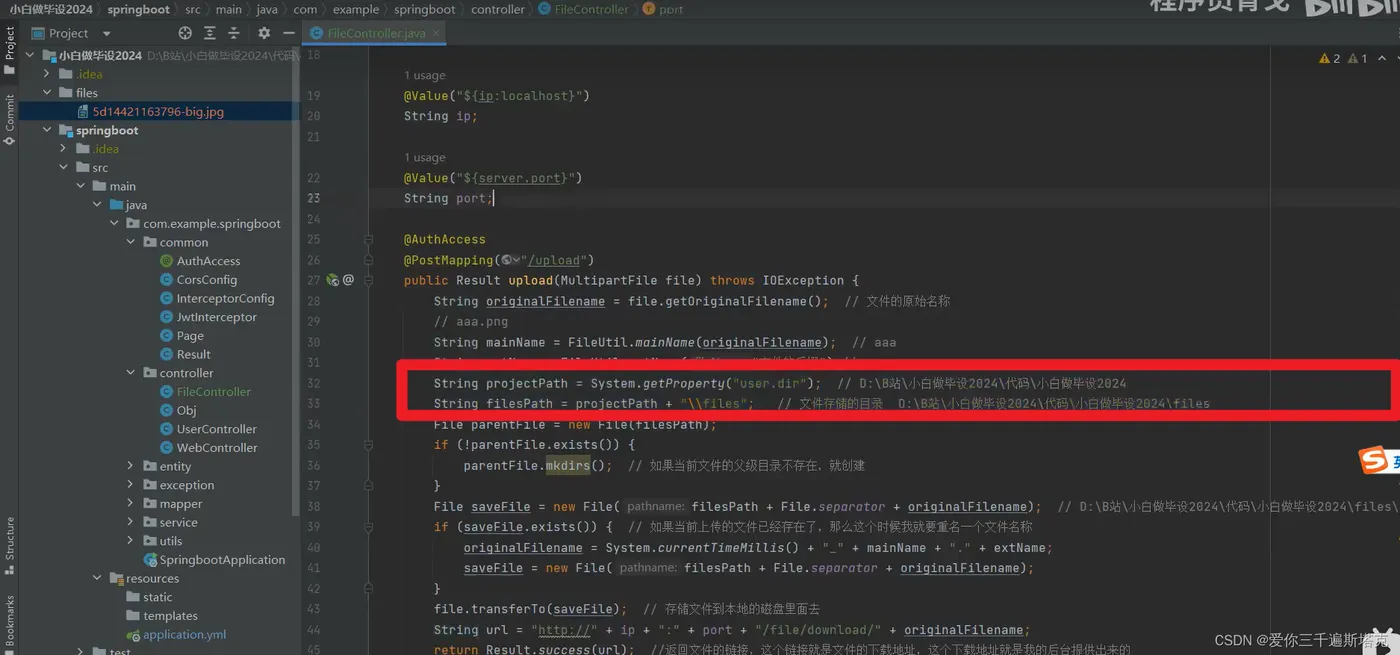
这里添加一个常量:

支持PTF和World格式,相应接口
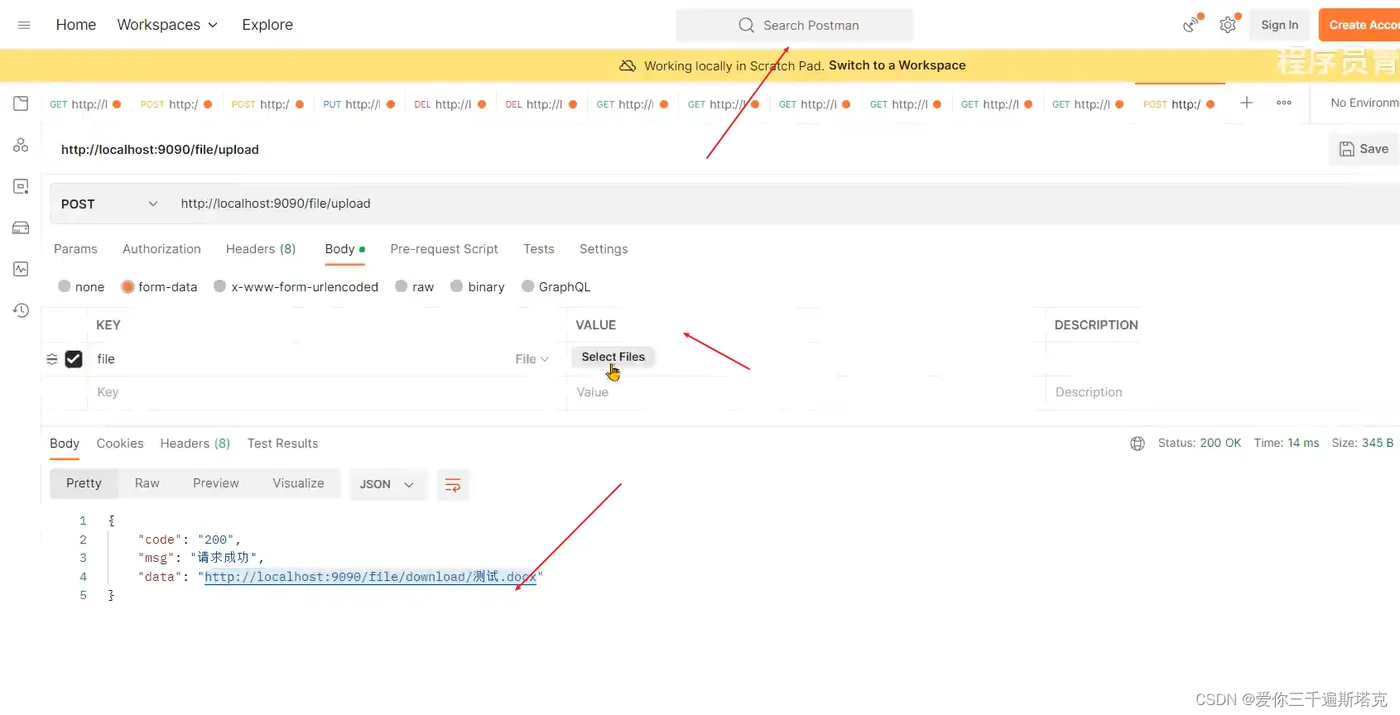
服务器默认是1M

设置上传文件的大小

给你加一个异常的处理器

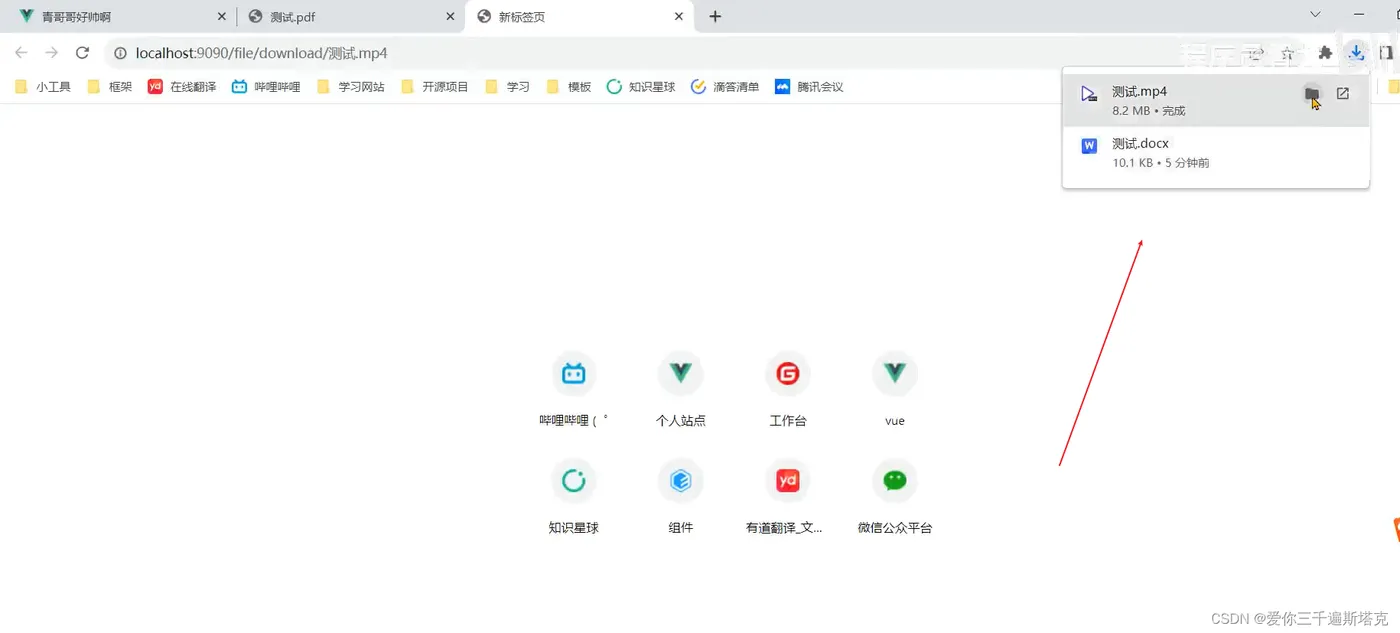
mp4也是要下载之后才能看的
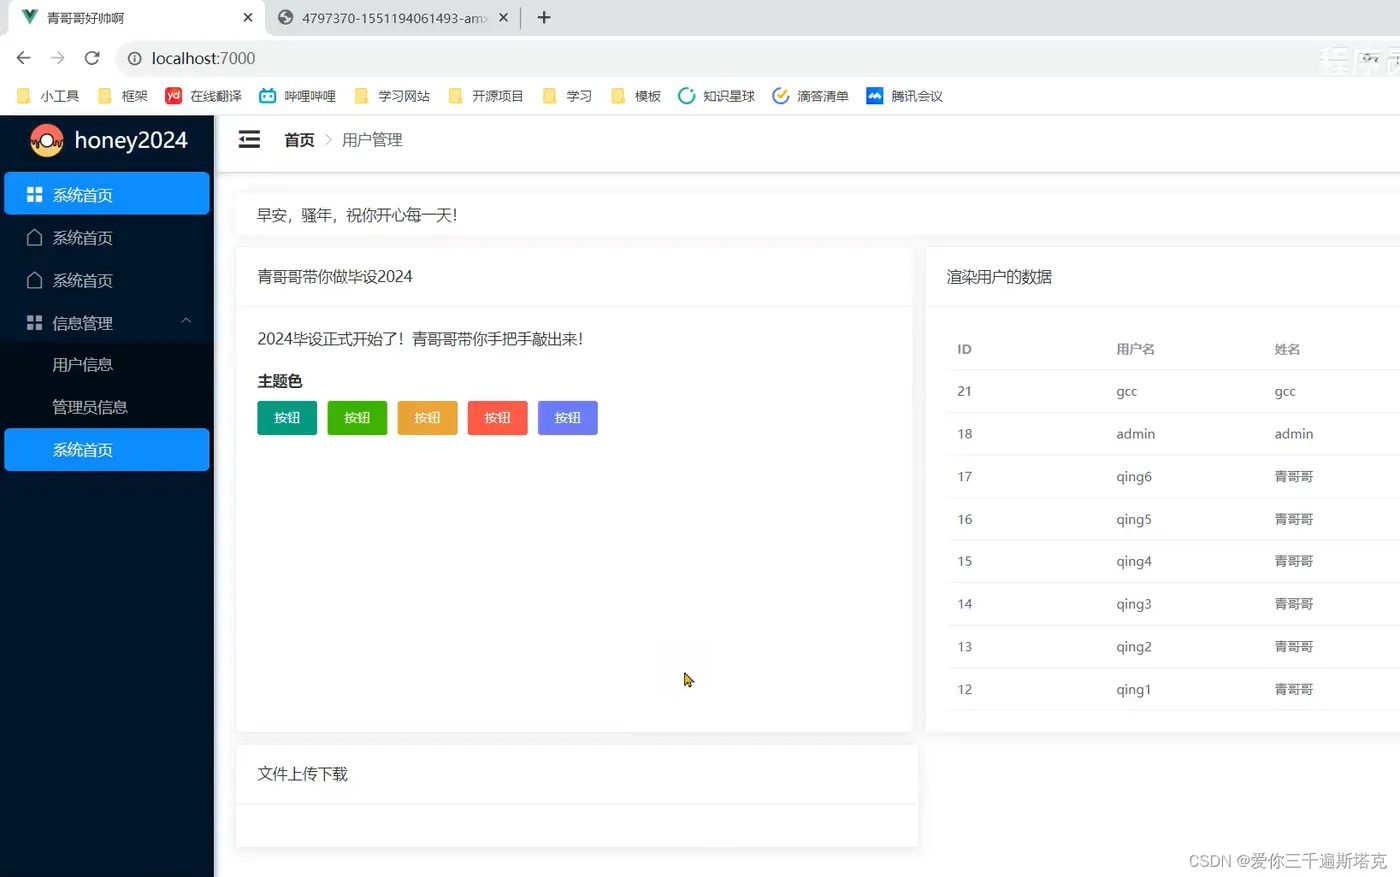
文件上传的文件路径
          <div style="display: flex; margin: 10px 0">
          <el-card style="width: 50%;margin-right: 10px;">
            <template #header>
              <div class="card-header">
                <span>文件上传下载测试</span>
              </div>
              <div></div>
            </template>
          </el-card>
          </div>
文件上传的资料,ElementUI有设计框的资料:
快速开始 | Element Plus (gitee.io)

 <el-upload
    v-model:file-list="fileList"
    class="upload-demo"
    action="https://run.mocky.io/v3/9d059bf9-4660-45f2-925d-ce80ad6c4d15"
    multiple
    :on-preview="handlePreview"
    :on-remove="handleRemove"
    :before-remove="beforeRemove"
    :limit="3"
    :on-exceed="handleExceed"
  >
    <el-button type="primary">Click to upload</el-button>
    <template #tip>
      <div class="el-upload__tip">
        jpg/png files with a size less than 500KB.
      </div>
    </template>
  </el-upload>
el-upload资料

action后面添加的是接口的请求路径

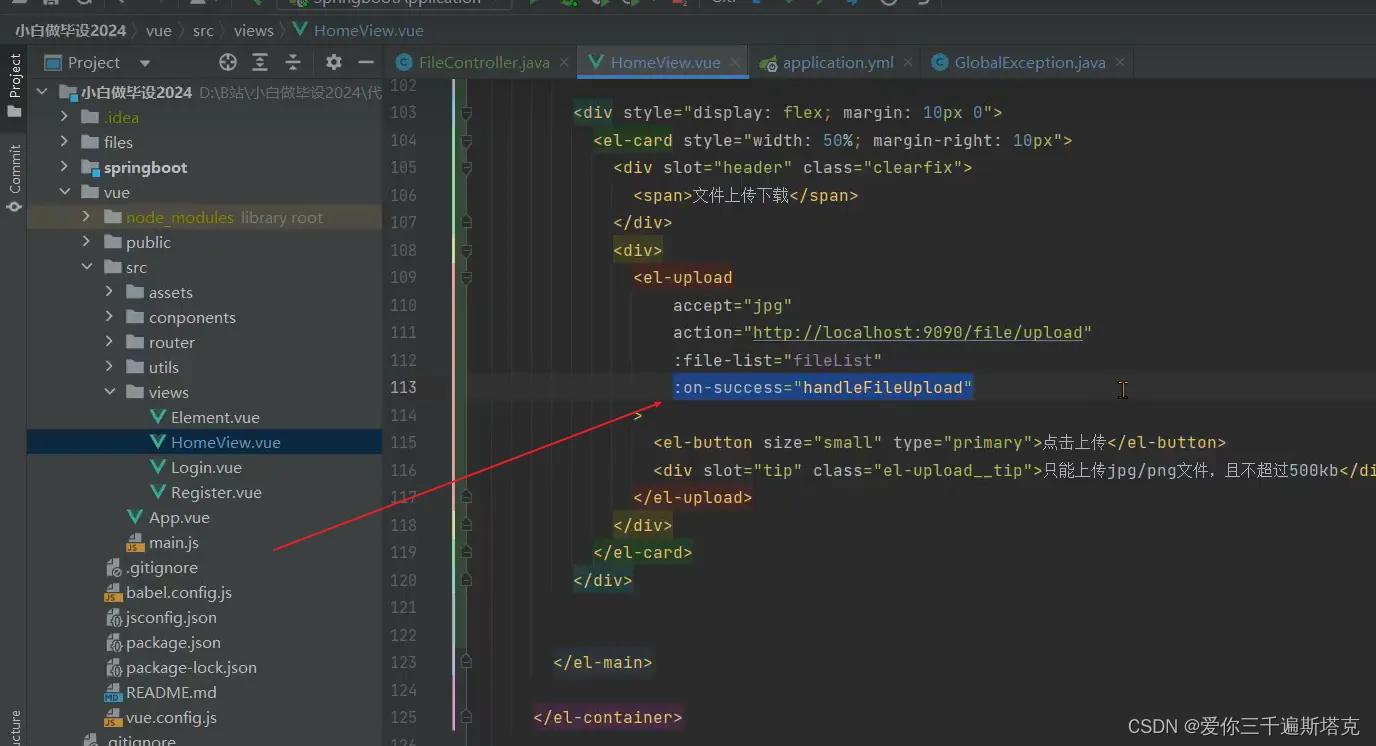
返回3个文章列表数据,后台的返回值,定义一个钩子

文件上传成功的钩子
  <script>
import axios from "axios";
// import request from '@/untils/request';
export default {
  name: "HomeView",
  data() {
    return {
      isCollapse: false,
      asideWidth: "200px",
      flag: true,
      users: [],
      fileList: [],
    };
  },
  methods: {
    handleCollapse() {
      this.isCollapse = !this.isCollapse;
      this.asideWidth = this.isCollapse ? "64px" : "200px";
    },
    handleFileUpload(response,file,fileList){
      console.log(response,file,fileList)
    }
  },
  mounted() {
    // request.get('/user/selectAll').then(res => {
    //   this.users = res.data;
    // })
    axios.get("http://localhost:9090/user/selectAll").then((res) => {
      this.users = res.data.data;
    });

    axios.get("http://localhost:9090/user/selectById/5").then((res) => {
      console.log(res.data);
    });
  },
};
</script>
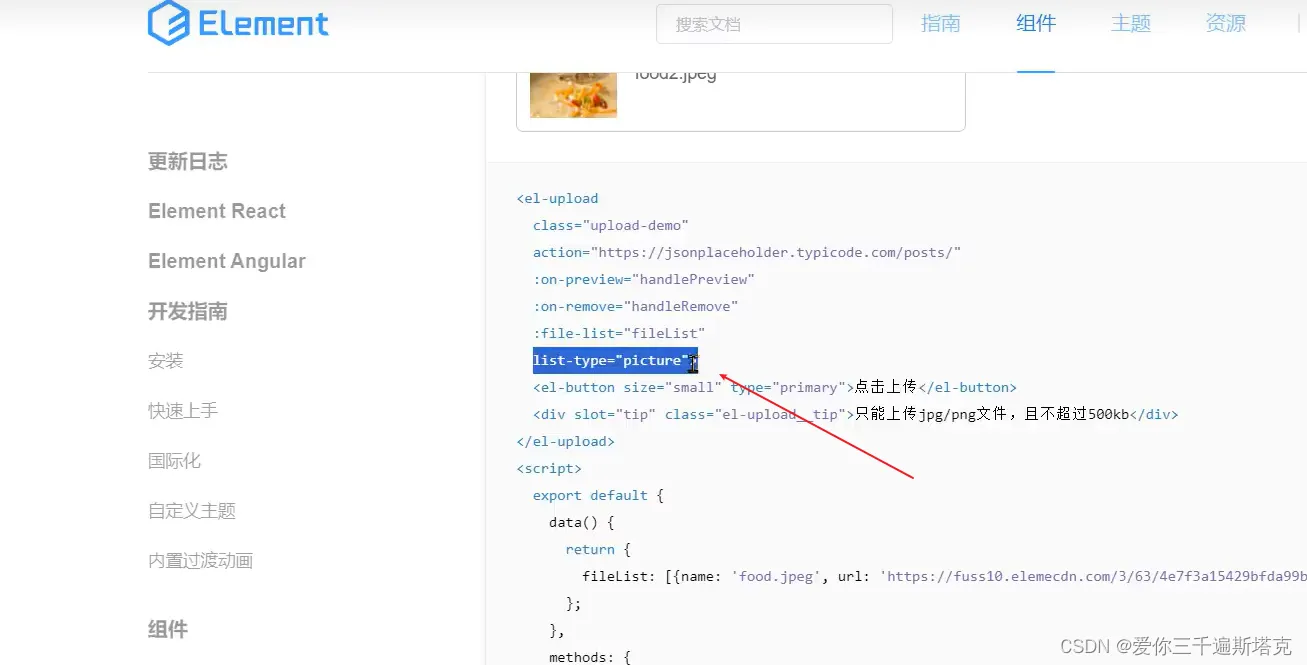
点击图片实现预览,在el-upload中进行添加
list-type="picture"
<el-upload
                    v-model:file-list="fileList"
                    class="upload-demo"
                    action="http://localhost:9090/file/upload"
                    list-type="picture"
                    :file-list="fileList"
                    :on-success="handleFileUpload"
                  >
                    <el-button type="primary"
                      >点击上传jpg/png文件,且不超过500kb</el-button
                    >
                    <template #tip>
                      <div class="el-upload__tip">
                        只能上传jpg/png文件,且不能超过500kb
                      </div>
                    </template>
                  </el-upload>
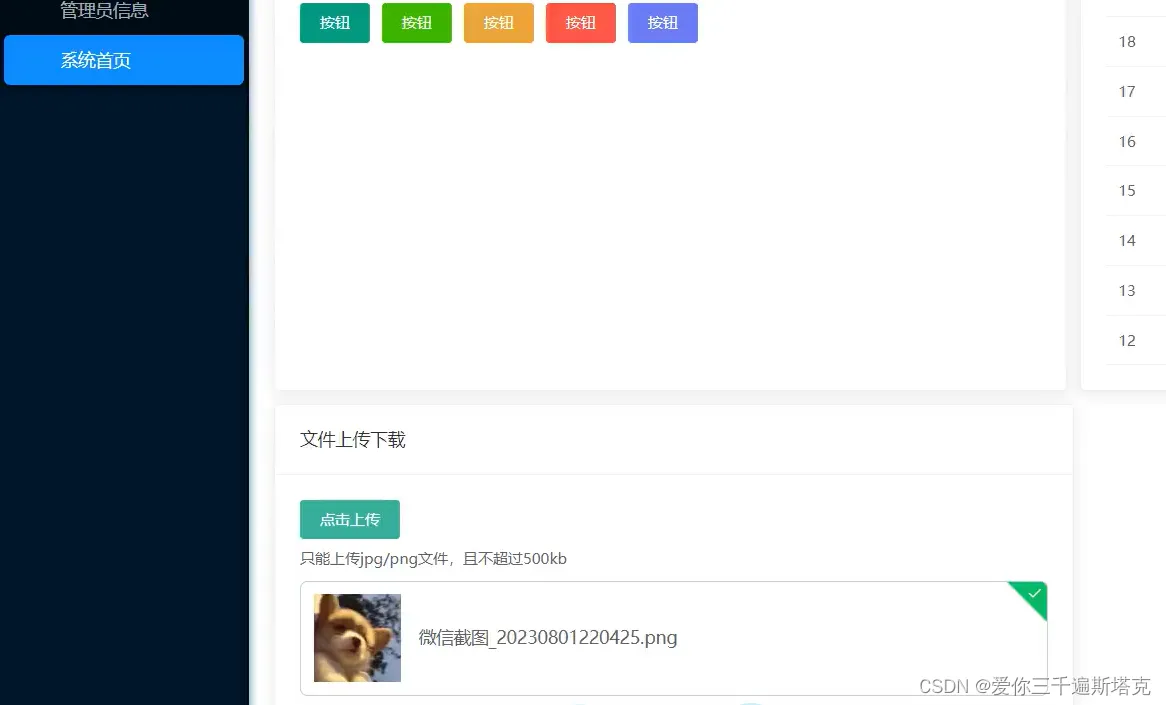
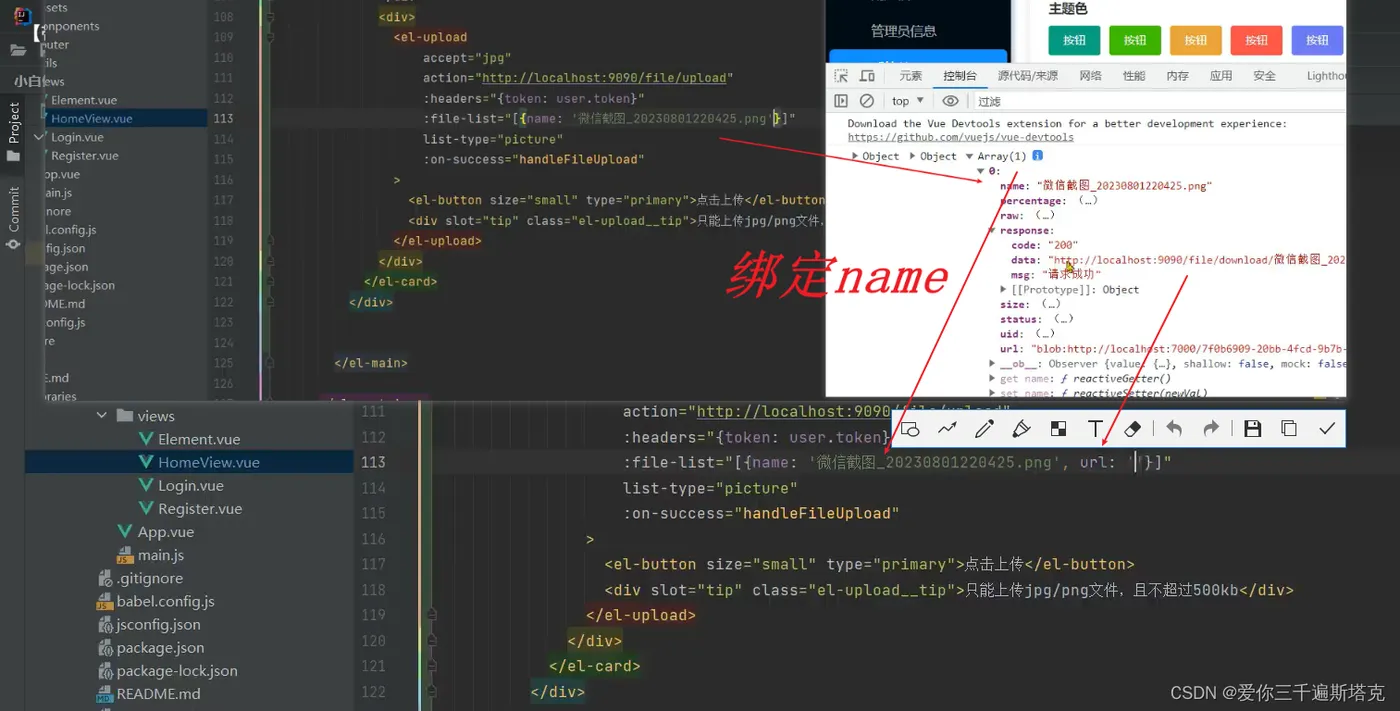
两个值匹配就行了
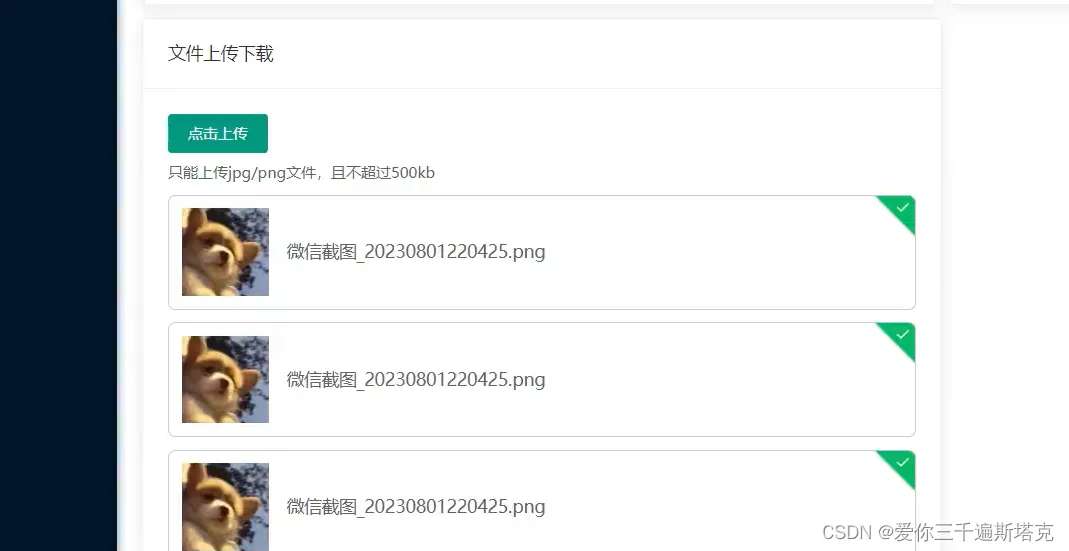
还可以存多个对象,效果

用绑定的数组的方法:
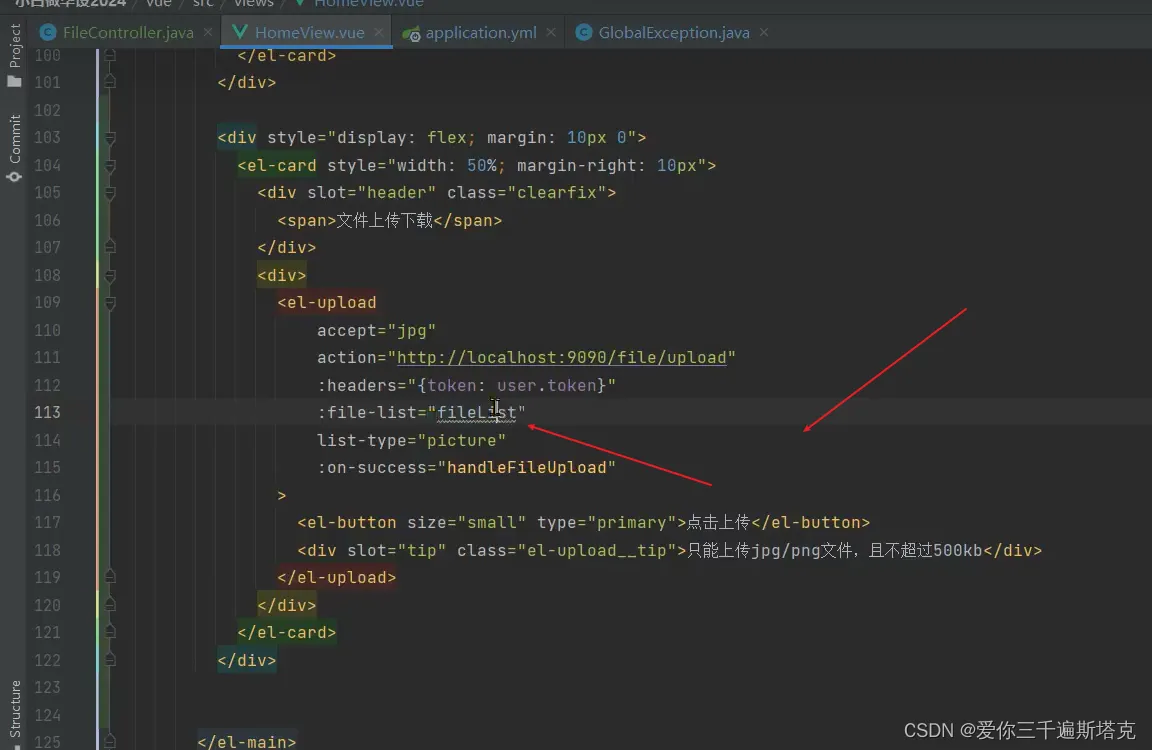
创建数组方式:

文件上传之后,使用this.fileList = fileList

不要让他显示文件的列表了,比较难看
 因为要返回表格,因此,我们要给他返回一个表格:给他写一个:on-success的内容,handleTable
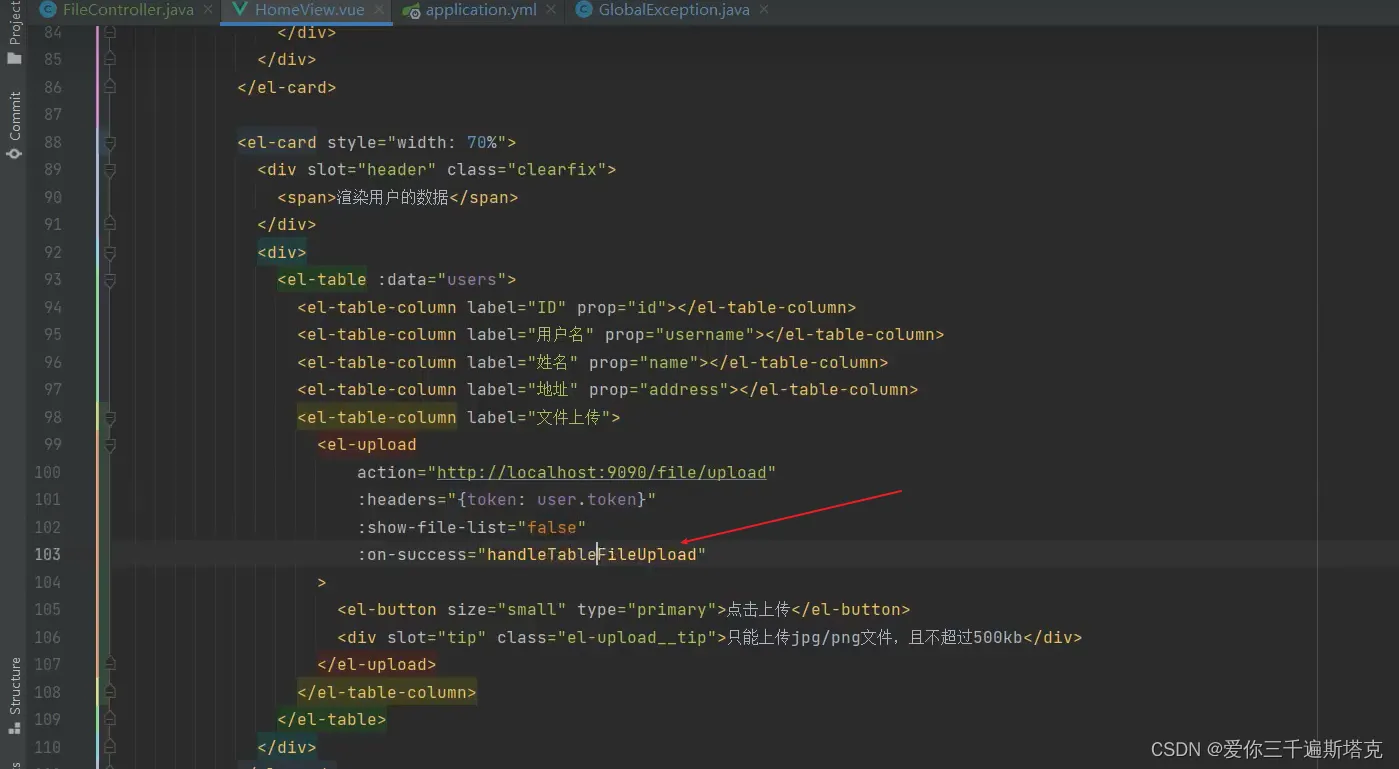
定义一个方法

这里有4个参数
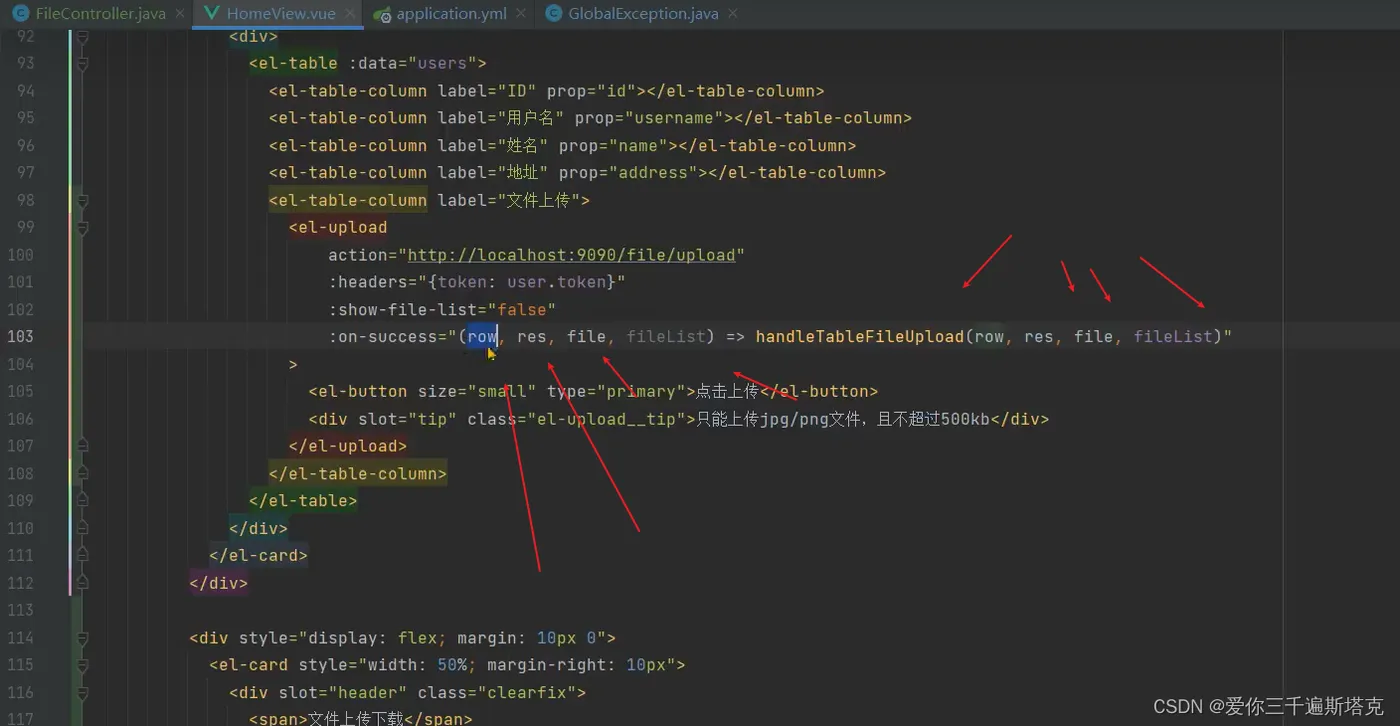
添加一下实参和虚参,添加一个template,v-slot绑定数据

单文件源码:
<template>
  <div>
    <el-container>
      <el-aside
        :width="asideWidth"
        style="min-height: 100vh; background-color: #001529"
      >
        <div
          style="
            height: 60px;
            color: white;
            display: flex;
            align-items: center;
            justify-content: center;
          "
        >
          <!-- <img src="@/assets/logo.png" style="width: 60px;height: 10px;">
                      <span class="logo-title" v-show="!isCollapse">零一</span> -->
        </div>
        <el-menu
          :collapse="isCollapse"
          style="border: none"
          background-color="#001529"
          text-color="rgba(255,255,255,0.65)"
          default-active="$router.path"
        >
          <el-menu-item index="/">
            <el-icon>
              <House />
            </el-icon>
            <span>系统首页</span>
          </el-menu-item>
          <el-menu-item>
            <el-icon>
              <House />
            </el-icon>
            <span>系统首页</span>
          </el-menu-item>
          <el-menu-item>
            <el-icon>
              <House />
            </el-icon>
            <span>系统首页</span>
          </el-menu-item>
          <el-sub-menu index="1-4">
            <template #title>
              <el-icon style="margin-left: 3px">
                <Menu />
              </el-icon>
              <span>信息管理</span>
            </template>
            <el-menu-item index="1-4-1">用户信息</el-menu-item>
          </el-sub-menu>
        </el-menu>
      </el-aside>
      <el-container>
        <el-header>
          <el-icon @click="handleCollapse">
            <component :is="Expand" v-if="isCollapse"></component>
            <component :is="Fold" v-else></component>
          </el-icon>
          <el-breadcrumb :separator-icon="ArrowRight" style="margin-left: 20px">
            <el-breadcrumb-item :to="{ path: '/' }">首页</el-breadcrumb-item>
            <el-breadcrumb-item :to="{ path: '/' }"
              >用户管理</el-breadcrumb-item
            >
          </el-breadcrumb>
        </el-header>
        <el-main>
          <div style="display: flex">
            <el-card style="width: 30%; margin-right: 10px">
              <template #header>
                <div class="card-header">
                  <span>Card name</span>
                </div>
              </template>
              <p v-for="o in 4" :key="o" class="text item">
                {{ "List item " + o }}
              </p>
            </el-card>
            <el-card style="width: 70%">
              <template #header>
                <div class="card-header">
                  <span>Card name</span>
                </div>
              </template>
              <div>
                <el-table :data="users">
                  <el-table-column prop="id" label="ID"></el-table-column>
                  <el-table-column
                    prop="username"
                    label="用户名"
                  ></el-table-column>
                  <el-table-column prop="name" label="姓名"></el-table-column>
                  <el-table-column
                    prop="address"
                    label="地址"
                  ></el-table-column>
                  <el-table-column label="文件上传">
                    <template v-slot="scope">
                    <el-upload
                    class="upload-demo"
                    action="http://localhost:9090/file/upload"
                    :show-file-list="false"
                    :on-success="(row,res,file,fileList) => handleTableFileUpload(scope.row,res,file,fileList)"
                  >
                    <el-button type="primary" size="small"
                      >点击上传</el-button
                    >
                    <template #tip>
                      <div class="el-upload__tip" style="font-size: 12px">
                       文件最大上传1000M
                      </div>
                    </template>
                  </el-upload>
                </template>
                  </el-table-column>
                  <el-table-column label="文件上传">
                    <template v-slot="scope">
                      <el-image v-if="scope.row.avatar" :src="scope.row.avatar" style="width: 50px;height: 50px;"></el-image>
                    </template>
                  </el-table-column>
                </el-table>
              </div>
            </el-card>
          </div>
          <div style="display: flex; margin: 10px 0">
            <el-card style="width: 50%; margin-right: 10px">
              <template #header>
                <div class="card-header">
                  <span>文件上传下载测试</span>
                </div>
                <div>

                  <div>
                    <el-input v-model="url"></el-input>
                    <el-button>下载文件</el-button>
                  </div>
                </div>
              </template>
            </el-card>
          </div>
        </el-main>
      </el-container>
    </el-container>
  </div>
</template>
  <style scoped>
.el-menu--inline {
  background-color: #000c17 !important;
}

.el-menu--inline .el-menu-item {
  background-color: #000c17 !important;
}

.el-menu-item:hover,
.el-sub-menu__title:hover span {
  color: #fff !important;
}

.el-sub-menu__title:hover i {
  color: #fff !important;
}

.el-menu-item.is-active {
  background-color: #40a9ff !important;
  color: #fff;
  border-radius: 5px !important;
  margin: 4px !important;
  width: calc(100% -8px);
  margin-left: 4px;
}

.el-menu-item.is-active i,
.el-menu-item.el-menu-item.is-active .el-tooltip {
  margin-left: -4px;
}

.el-menu-item {
  height: 40px !important;
  line-height: 40px !important;
  margin: 4px !important;
}

.el-submenu__title {
  height: 40px !important;
  line-height: 40px !important;
  margin: 4px !important;
}

.el-aside {
  transition: width 0.3s;
  box-shadow: 2px 0 6px rgba(0, 21, 41, 0.35);
}
.el-header {
  box-shadow: 2px 0 6px rgba(0, 21, 41, 0.35);
  display: flex;
  align-items: center;
}
.el-aside div .img {
  width: 30px;
}
.el-aside div span {
  font-size: 14px;
  font-family: "Times New Roman", Times, serif;
  font-weight: 700;
}
.logo-title {
  margin-left: 5px;
  font-size: 20px;
  transition: all 0.3s;
}
</style>
  <script setup>
import { House, Menu, Fold, Expand, ArrowRight } from "@element-plus/icons-vue";
</script>
  <script>
import axios from "axios";
// import request from '@/untils/request';
export default {
  name: "HomeView",
  data() {
    return {
      isCollapse: false,
      asideWidth: "200px",
      flag: true,
      users: []
    };
  },
  methods: {
    handleTableFileUpload(row,file,fileList){
      console.log(row,file,fileList)
      row.avatar = file.response.data;
      // this.$set(row,'avatar',file.response.data)
      console.log(row)
      axios.put('/user/update',row).then(res => {
        if (res.data.code === '200'){
          this.$message.success('上传成功')
        } else {
          this.$message.error(res.data.msg)
        }
      })
    },
    handleCollapse() {
      this.isCollapse = !this.isCollapse;
      this.asideWidth = this.isCollapse ? "64px" : "200px";
    },
    handleFileUpload(response,file,fileList){
      this.fileList = fileList
    }
  },
  mounted() {
    // request.get('/user/selectAll').then(res => {
    //   this.users = res.data;
    // })
    axios.get("http://localhost:9090/user/selectAll").then((res) => {
      this.users = res.data.data;
    });

    axios.get("http://localhost:9090/user/selectById/5").then((res) => {
      console.log(res.data);
    });
  },
};
</script>
上传和下载接口源码:
package zero.file.videoProject.controller;


import cn.hutool.core.io.FileUtil;
import org.springframework.beans.factory.annotation.Value;
import org.springframework.web.bind.annotation.*;
import org.springframework.web.multipart.MultipartFile;
import zero.file.videoProject.bean.Result;

import javax.servlet.ServletOutputStream;
import javax.servlet.http.HttpServletResponse;
import java.io.File;
import java.io.IOException;

@RestController
@RequestMapping("/file")
public class FileController {
    @Value("${ip:localhost}")
    String ip;
    @Value("${server.port}")
    String port;
    private static final String ROOT_PATH = System.getProperty("user.dir") + File.separator + "files";
    @PostMapping("/upload")
    public Result upload(MultipartFile file) throws IOException {
        String originalFilename = file.getOriginalFilename(); // 文件的原始名称
        String mainName = FileUtil.mainName(originalFilename);
        String extName = FileUtil.extName(originalFilename);
        // 当前文件的目录
        // 判断一下文件存储的路径存不存在,这种主要是文件上传重名问题
        if (!FileUtil.exist(ROOT_PATH)){
            FileUtil.mkdir(ROOT_PATH);
            // 如果不存在,创建这样一个目录
        }
        // 如果当前文件的父级目录不存在
        if (FileUtil.exist(ROOT_PATH + File.separator + originalFilename)){
            originalFilename = System.currentTimeMillis() + "_" + mainName+ "." + extName;
        }
        File saveFile = new File(ROOT_PATH + File.separator + originalFilename); // D:\project\零一电科\技术资料\lingyidianke\zeroBackEnd\files\\121232312321323_aaa.png
        file.transferTo(saveFile);
        String url = "http://" + ip + ":" + port + "/file/download/" + originalFilename;
        return Result.success(url);
    }
    @GetMapping("/download/{fileName}")
    public void download(@PathVariable String fileName,HttpServletResponse response) throws IOException {
        String filePath = ROOT_PATH + File.separator + fileName;
        if (!FileUtil.exist(filePath)) {
            return;
        }
        byte[] bytes = FileUtil.readBytes(filePath);
        ServletOutputStream outputStream = response.getOutputStream();
        outputStream.write(bytes);
        outputStream.flush();
        outputStream.close();
    }
}
效果:

如何将5条数据合并在一起:
定义一个url
let urls = fileList.map(v =>v.response.data) 将5条URL合并在一起

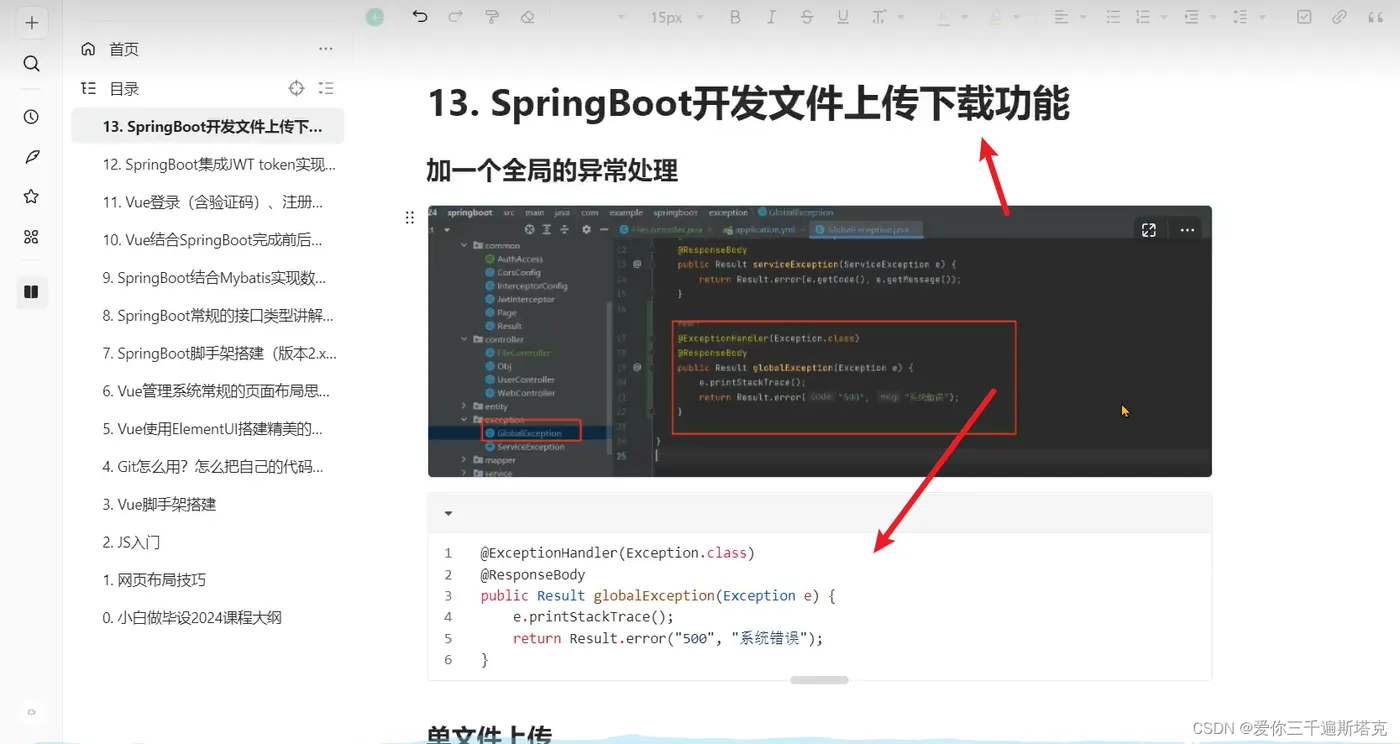
文档编写的资料
文件预览的写法
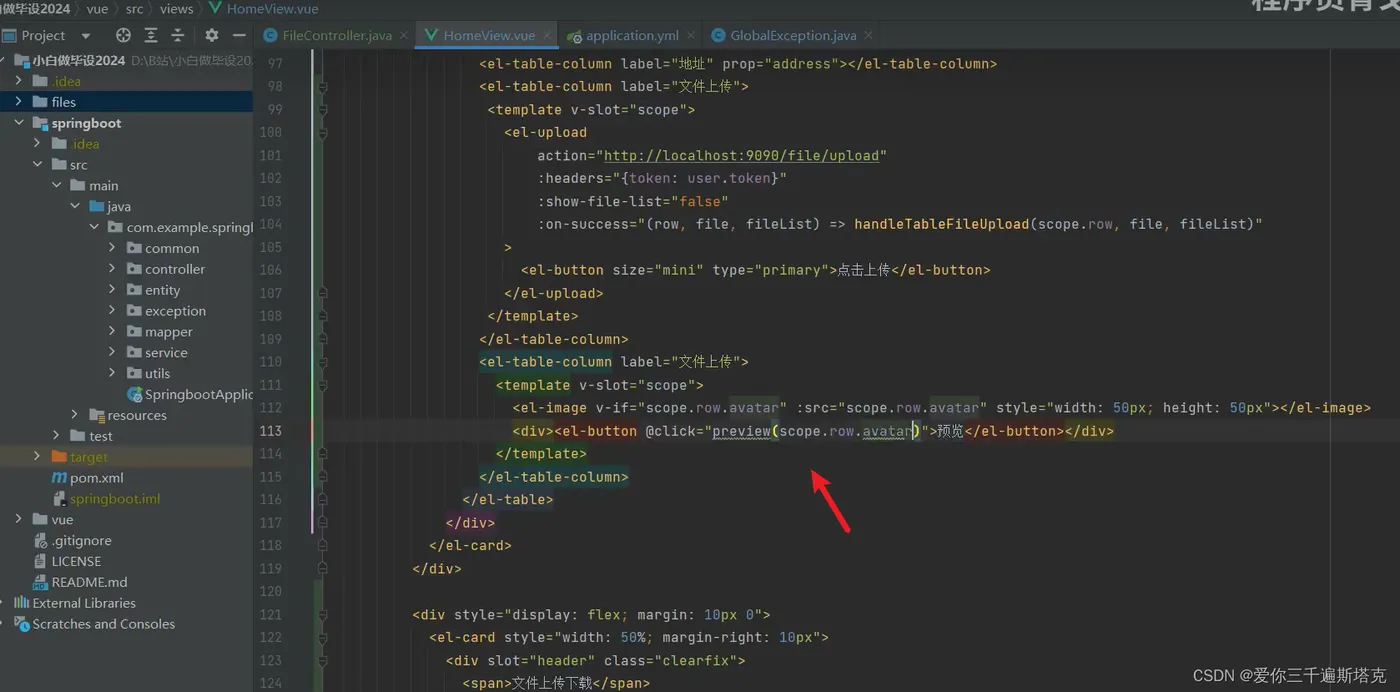
预览和文件下载的写法:
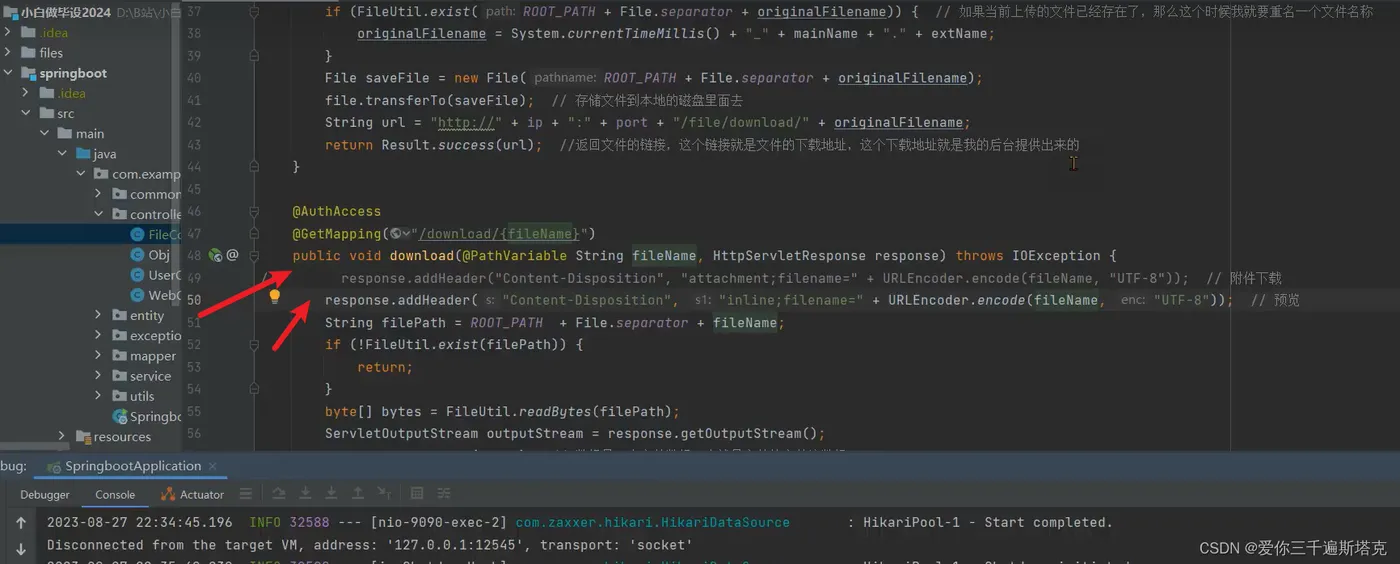
//        response.addHeader("Content-Disposition","attachment;filename=" + URLEncoder.encode(fileName,"UTF-8"));
        response.addHeader("Content-Disposition","inline;filename=" + URLEncoder.encode(fileName,"UTF-8"));
源码;
package zero.file.videoProject.controller;


import cn.hutool.core.io.FileUtil;
import org.springframework.beans.factory.annotation.Value;
import org.springframework.web.bind.annotation.*;
import org.springframework.web.multipart.MultipartFile;
import zero.file.videoProject.bean.Result;

import javax.servlet.ServletOutputStream;
import javax.servlet.http.HttpServletResponse;
import java.io.File;
import java.io.IOException;
import java.net.URLEncoder;

@RestController
@RequestMapping("/file")
public class FileController {
    @Value("${ip:localhost}")
    String ip;
    @Value("${server.port}")
    String port;
    private static final String ROOT_PATH = System.getProperty("user.dir") + File.separator + "files";
    @PostMapping("/upload")
    public Result upload(MultipartFile file) throws IOException {
        String originalFilename = file.getOriginalFilename(); // 文件的原始名称
        String mainName = FileUtil.mainName(originalFilename);
        String extName = FileUtil.extName(originalFilename);
        // 当前文件的目录
        // 判断一下文件存储的路径存不存在,这种主要是文件上传重名问题
        if (!FileUtil.exist(ROOT_PATH)){
            FileUtil.mkdir(ROOT_PATH);
            // 如果不存在,创建这样一个目录
        }
        // 如果当前文件的父级目录不存在
        if (FileUtil.exist(ROOT_PATH + File.separator + originalFilename)){
            originalFilename = System.currentTimeMillis() + "_" + mainName+ "." + extName;
        }
        File saveFile = new File(ROOT_PATH + File.separator + originalFilename); // D:\project\零一电科\技术资料\lingyidianke\zeroBackEnd\files\\121232312321323_aaa.png
        file.transferTo(saveFile);
        String url = "http://" + ip + ":" + port + "/file/download/" + originalFilename;
        return Result.success(url);
    }
    @GetMapping("/download/{fileName}")
    public void download(@PathVariable String fileName,HttpServletResponse response) throws IOException {
//        response.addHeader("Content-Disposition","attachment;filename=" + URLEncoder.encode(fileName,"UTF-8"));
        response.addHeader("Content-Disposition","inline;filename=" + URLEncoder.encode(fileName,"UTF-8"));
        String filePath = ROOT_PATH + File.separator + fileName;
        if (!FileUtil.exist(filePath)) {
            return;
        }
        byte[] bytes = FileUtil.readBytes(filePath);
        ServletOutputStream outputStream = response.getOutputStream();
        outputStream.write(bytes);
        outputStream.flush();
        outputStream.close();
    }
}